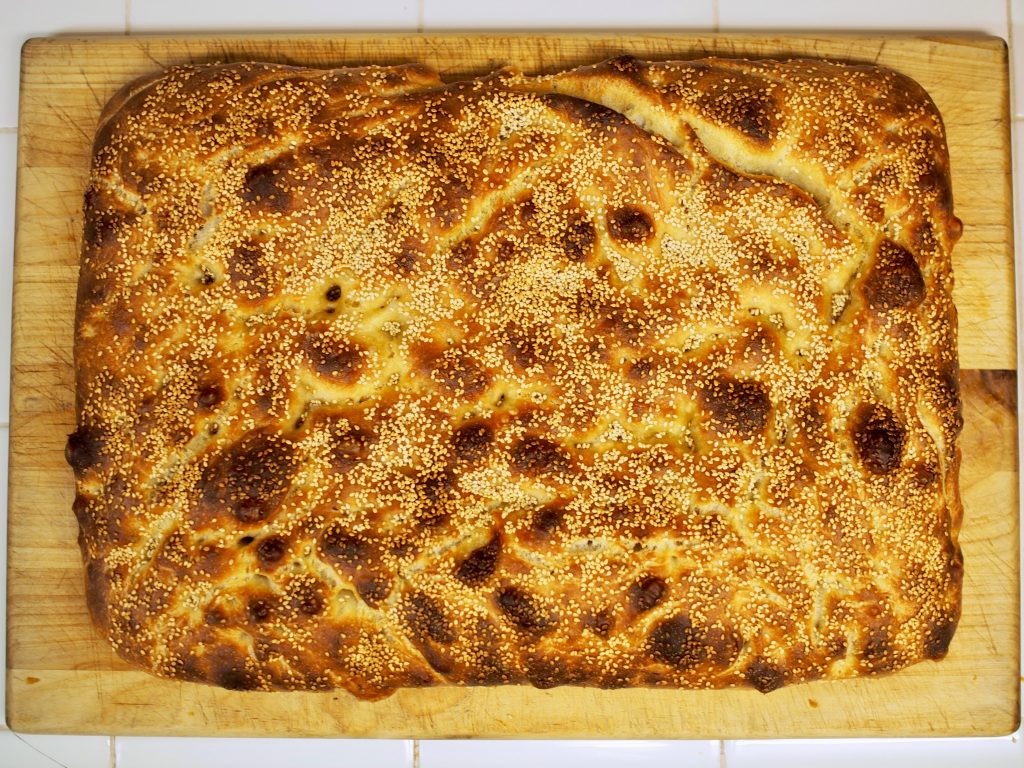
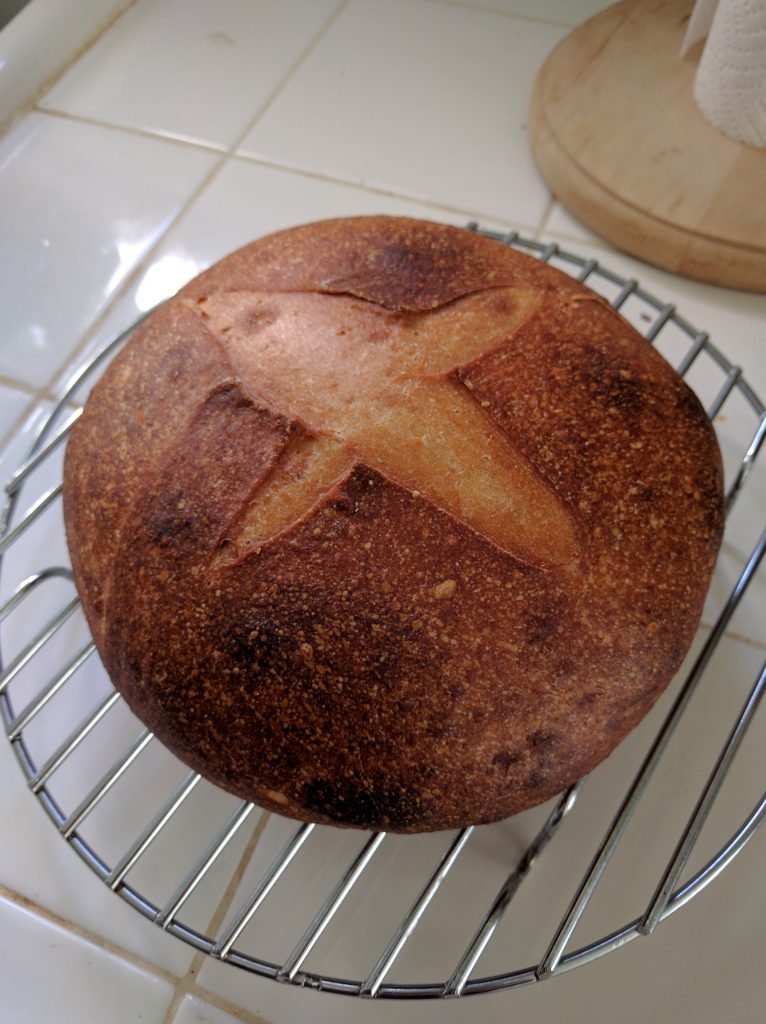
I recently shared my sourdough recipe. I mentioned as an aside that you can also make focaccia, pizza, and other breads from the same base. Here’s how.
Resting after stretching.
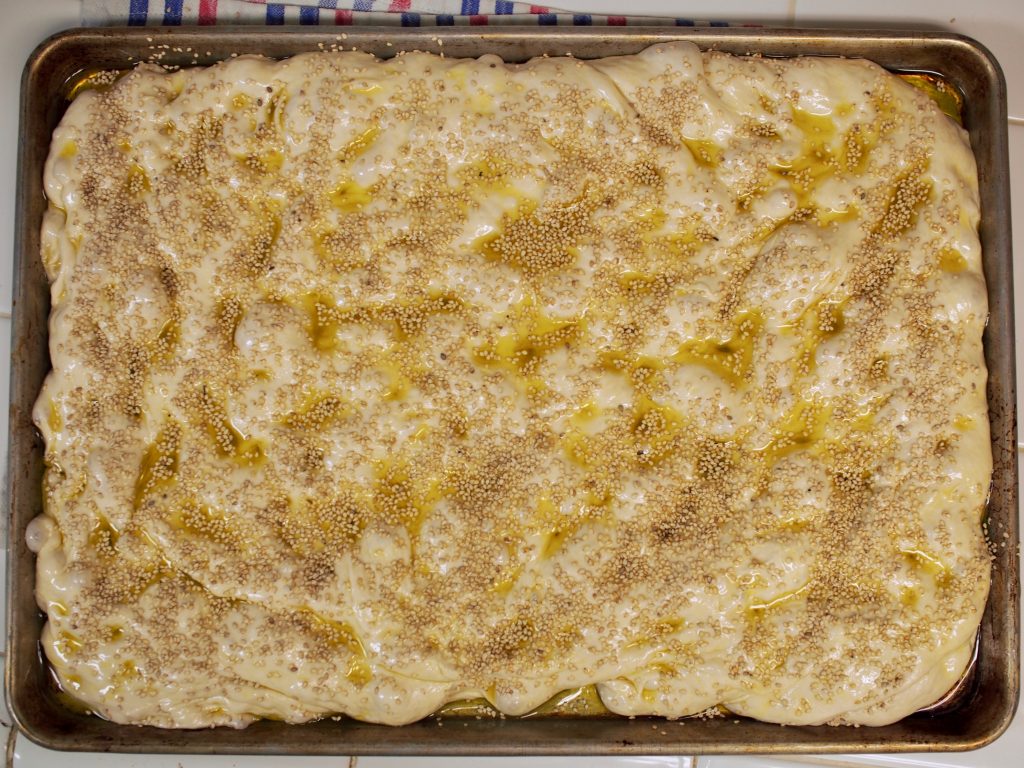
Make a 1000g batch, relatively high hydration—say, 750ml. Let it rise really nicely—this batch tripled.
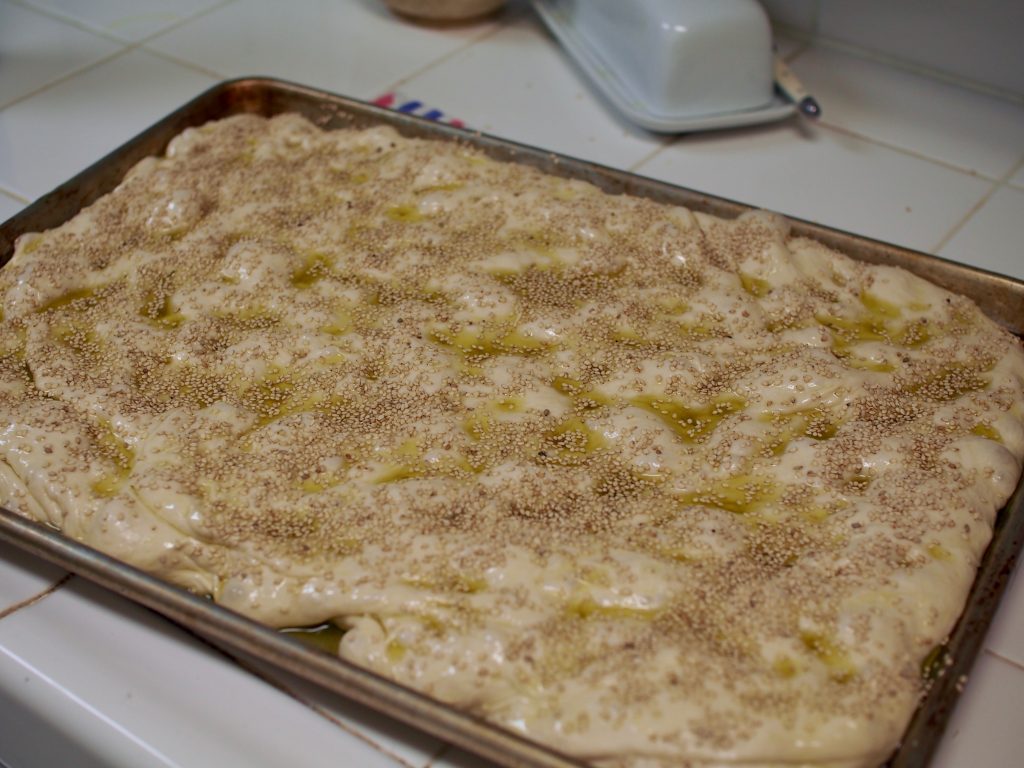
Pour out 1/2 C olive oil into a measuring cup. Use a bit of it—less than 1/4 C—to coat the bottom of a large sheet pan. Scrape the dough in, turn it over to coat, and let proof/rest for at least 30min. Preheat the oven to 500ºF.
Reaching up under the dough, stretch it out to the corners. Let it rest for a few minutes, then pour the remaining olive oil on top. Top with herbs, whatever.
Bake for 15min, turn, then bake for another 15-20min. (In my oven, I an aluminum cookie sheet on the rack below, so that the bottom of the focaccia doesn’t scorch.) Remove from the oven, let cool, and remove from the pan with a spatula.
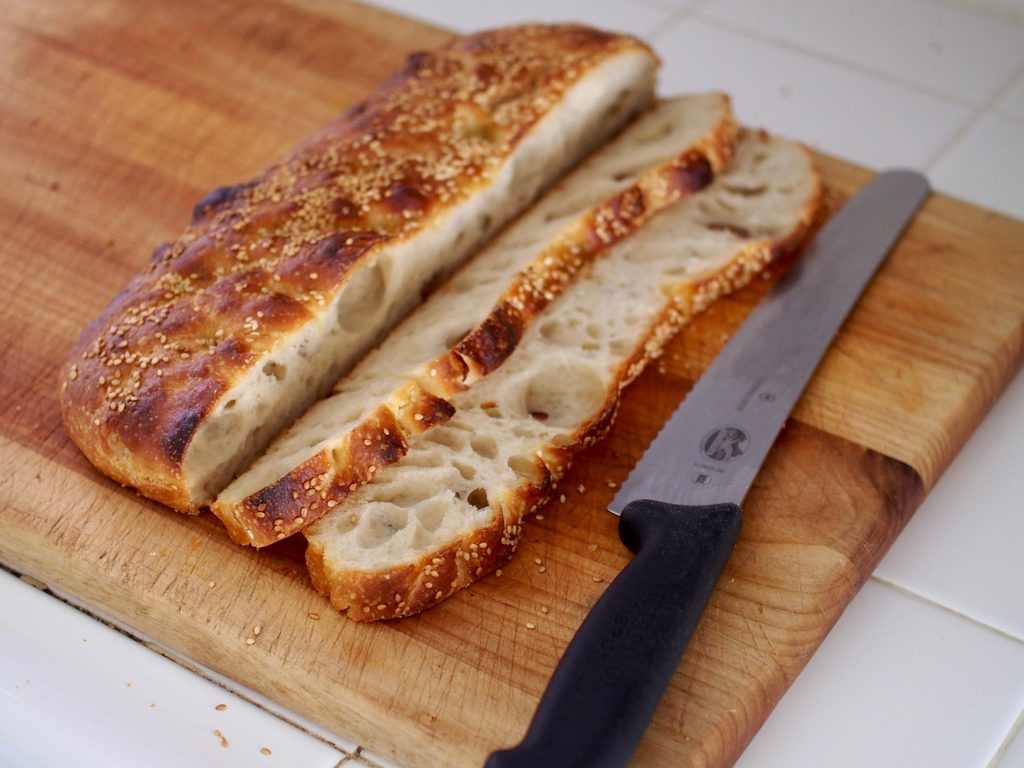
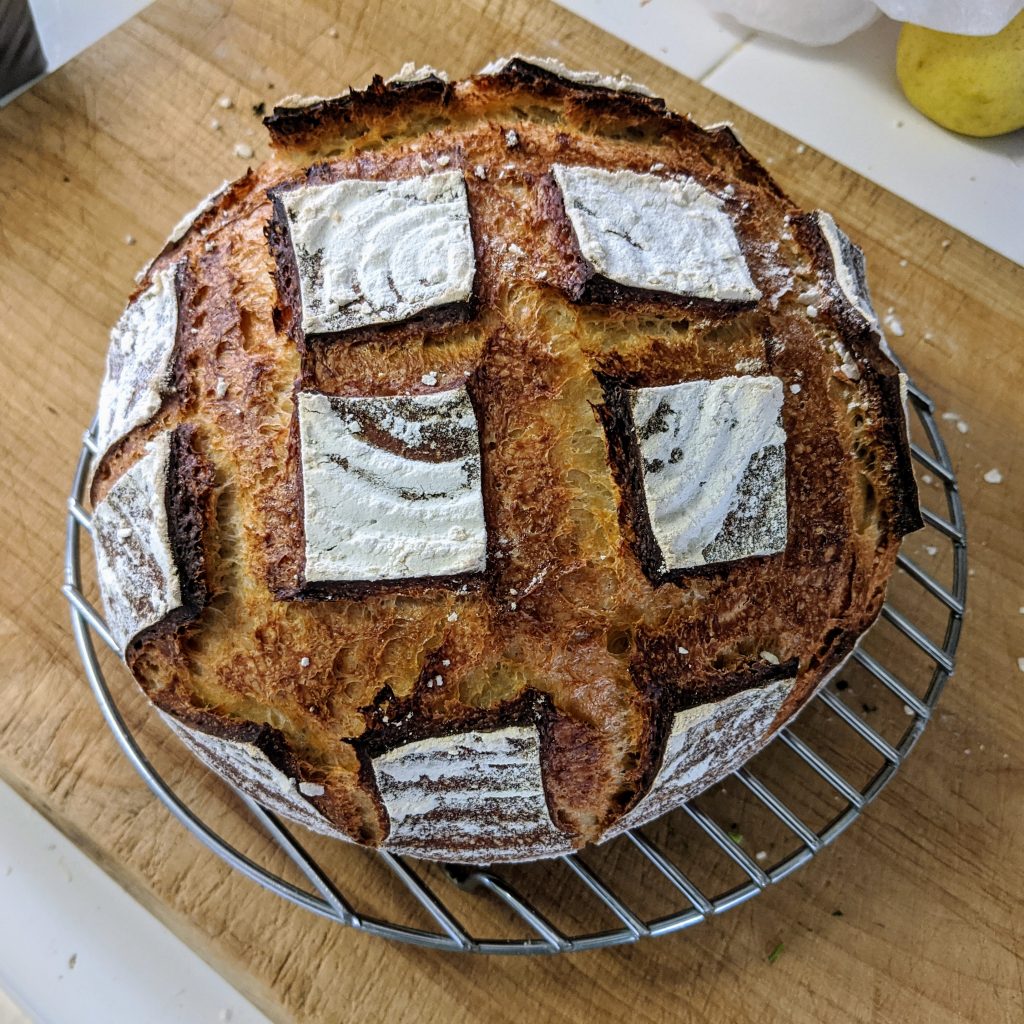
There’s more than one way to slice a focaccia; these slices were dipped in hummus bi tahini.
If you’re going to eat it warm, finish it within a day or two. Makes excellent croutons. This batch was a little under-proofed… you can definitely get more loft.
This is my recipe for sourdough. A lot of credit goes to Michael O’Malley, who gave me his starter and got me going, and a lot of credit goes to a multitude of books I’ve read. These folks are responsible for anything I say that’s helpful; I’m responsible for all of the things that are wrong or unhelpful.
One principle I particularly want to call out is: always bake two loaves. It’s part of O’Malley’s art practice to give loaves to people, and it’s certainly the genial thing to do. I’ve made it my practice, too… and I always make sure to give away the better loaf. You’ll get better at baking quickly, and you’ll make new friends to boot.
A dose of perspective
I didn’t think this would be a four thousand word document when I started writing. Baking is a journey. I’ve tried to write down all of my process to make that journey easier for you, but I’m sure it’s overwhelming.
If you don’t have a bread you bake regularly using commercial yeast, I think it’s best for your sanity to get a few loaves under your belt before you try sourdough. Try a no-knead bread recipe and bake it three or four times to get a little bit of a confidence. Once you’re feeling good and have a sourdough mother, read the “making your starter” section below. Expect things to rise more slowly with the sourdough than they did with the commercial yeast. Be patient, and it will be delicious.
Terminology
Flour is wheat flour. Only white all purpose (AP) or white bread flour should go in the mother; you can use just about anything you want in the starter and dough.
Water is room temperature, clean, filtered water. We have an inline filter in our sink in Claremont and that definitely improves the flavor of bread (and anything else we cook with or in water).
Salt is kosher or sea salt, not iodized salt. Iodine doesn’t get along well with most bacteria—including the lactobacillus that’ll put the sour in your sourdough.
The mother is the sourdough you keep. This is the mother lode, the supply on which you must not get high. I keep mine in the fridge.
Starter is made from the mother. It’s what you use to, uh, start a loaf of bread. It’s made up fresh each time you bake.
Making the mother
I’ve never made my own sourdough mother, so I can’t tell you much about it. Seamus Blackley has plenty of good advice on the subject. Or I can dry some out and mail you some. But once you have it, these instructions are for you.
Keeping the mother
My sourdough mother lives in the fridge, weighing in around 250g. To stay healthy it should be fed minimum once a month. I feed every time I bake, typically baking once a week—plenty for keeping the starter healthy. If you need to feed your starter but don’t have time to bake, follow the steps below at “Making your starter”: pull out 100g or so of mother, and add back in to the mother 50g water, mix, and then add in 50g flour. If you’re not using the 100g of mother to make a starter, discard it in the compost or trash.
I like to have about twice as much mother as I’ll be taking out to make starters. Since I’m typically baking two loaves that want 100g starter each, that means I need 200g starter each time I bake. Half of the starter comes from the mother, so that means I’ll be pulling 100g out from the mother each time I bake: so 250g mother is a good baseline, a little over twice what you take out at any given time. It doesn’t hurt to have too much mother, but too little is risky.
Your starter should smell good. Yeasty bready, maybe a little tangy if it’s been sitting for a minute. If it collects a liquid on top, that’s hooch—you can just pour it off. Mold means it’s time to start over.
Baker’s percentages
Bread recipes are typically given in baker’s percentages, where all of the ingredients are relative to the amount of flour used.
I typically bake 500g loaves, i.e., loaves with 500g of flour in them (the total weight is closer to 900g!). Such a loaf will last two adults for several days, if not a week. If a 500g loaf has 75% hydration, it will have .75 * 500 = 375g = 375ml water in it; if I’m using 20% starter, I’ll have .2 * 500 = 100g starter; if I put in 2% salt, it will have .02 * 500 = 10g salt. You could of course bake a bigger loaf. A 600g loaf with 70% hydration will have .7 * 600 = 420ml water.
My equipment
To bake bread, I use:
A ~1L tupperware container for holding the mother.
A 6qt food safe plastic bucket with lid.
A scale accurate to a few grams.
A silicone-headed spatula or stirrer for mixing the starter and the mother.
A plastic or silicone soft dough scraper for getting the dough out of the bucket.
A bench scraper for shaping the dough.
A plastic cutting board or melamine counter for shaping the dough.
Two 500g bannetons for proofing.
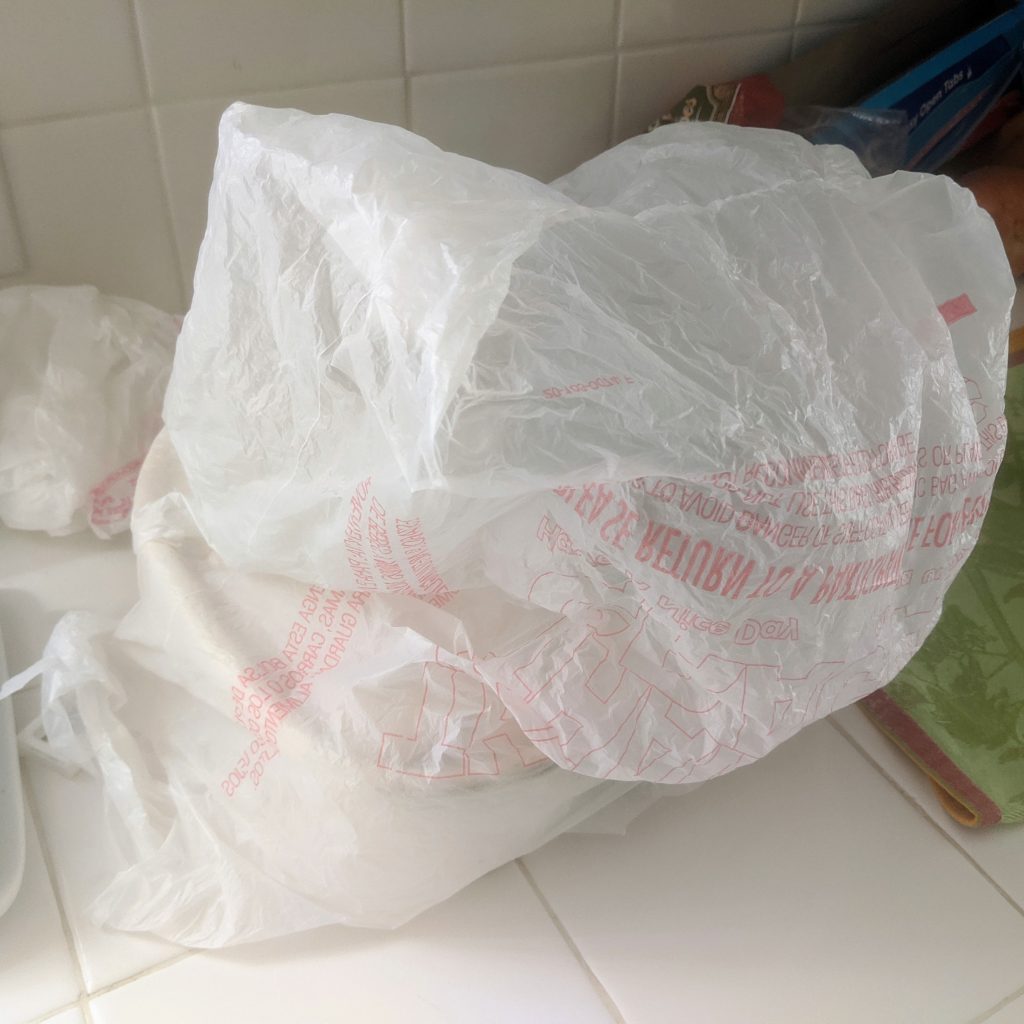
Two plastic grocery bags for covering the bannetons. They should easily fit over the banneton without touching the contents.
Two Lodge 3.2qt cast iron combo cookers for baking.
An oven… surprise! It should be able to comfortably get up to 450ºF.
A safety razor for slashing the dough.
A metal spatula for getting the bread out of the pan.
A cooling rack.
You need a scale. Some people can bake good bread without weight measures, but not me. If you’re only going to buy a single piece of equipment other than a scale, get the combo cookers—their steam trapping effects will significantly improve your bread.
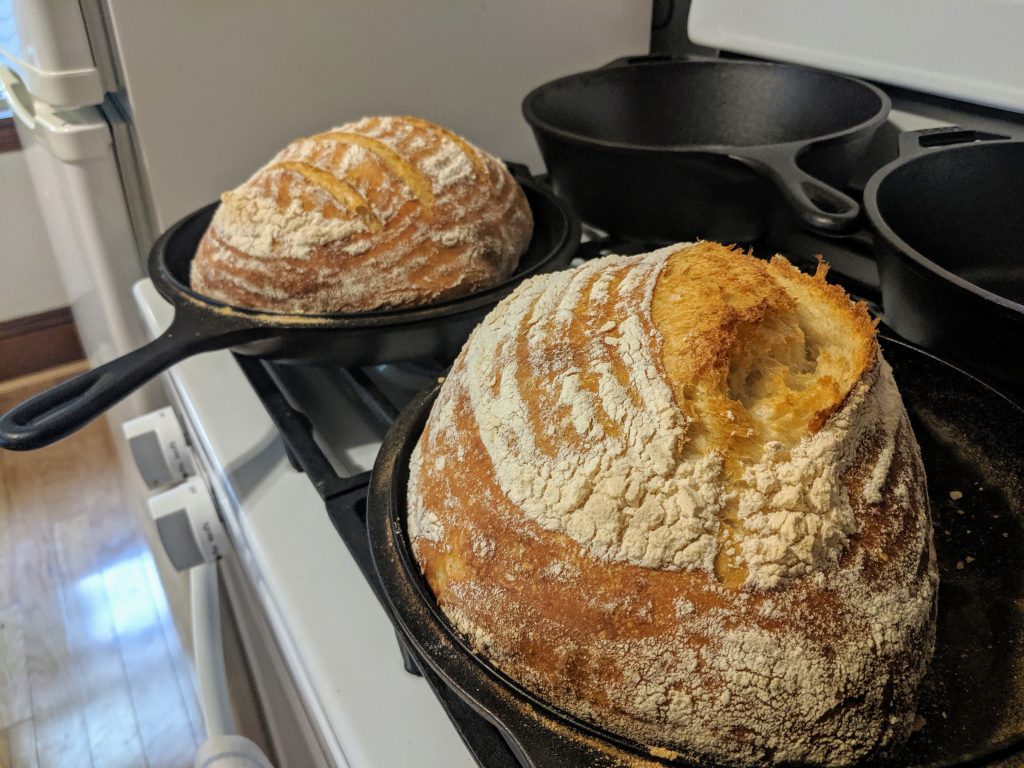
Combo cookers: easier than a Dutch oven, and with fewer scorched knuckles and forearms.
You don’t need a special bucket. You don’t need bannetons. You don’t need a combo cooker. You don’t need a razor or any of those scrapers. These are the tools I’ve learned to use because they help me treat the dough gently (to keep those precious gas bubbles!) or result in substantially better loaves in some other way.
You’ll also need the bread ingredients, of course—wheat flour, salt, water, and sourdough. If you’re using bannetons, you’ll want to mix up some banneton flour: a 50/50 mixture of AP flour and rice flour.
Before using bannetons for the first time, I lightly dampen them with a spray bottle (or my hand) and then rub a bit of AP flour into them. Get all the nooks and crannies and all the way up the sides. Shake out the excess and let them dry. You’ll still get a bit of sticking your first few times using them, but then it should even out. O’Malley just goes ahead and uses them without any treatment, though I think he gets more sticking at first.
My recipe
My core recipe uses 75% hydration, 20% starter, and 2% salt. I typically bake two loaves at a time, though. Here’s my two-loaf recipe broken down in each possible way:
Ingredient
Percentage
Actual amount in a loaf
Total amount I use to make two loaves
Flour
100%
500g
1000g
Water
75%
375g
750g
Starter
20%
100g
200g
Salt
2%
10g
20g
But I live in Claremont, CA—the edge of the high desert. On the humid East Coast, I use significantly less hydration—65%, or 650g for two loaves.
My procedure
My baking has several stages. I’ve written approximate active and passive times for each, and I’ll break down the recipe along these steps.
Step
Active time
Passive time
1
Making the starter
5min
6-12hr
2
Mixing up the dough
10min
3
Autolyse rest
20-60min
4
Kneading
5min
30min
5
Turning (2-3 times)
(each) 2min
(each) 30min
6
Bulk fermentation
2-12hr (or overnight)
7
Shaping
10min
30min
8
Proofing
1-3hr (or overnight)
9
Baking
5min
30-60min
10
Cooling
2min
1hr
11
Cleaning up
5min
12hr
I’ll give a high level overview of my approach, and then I’ll give detailed steps.
I make up a starter well before I’ll be baking. If I want to bake in the morning or early afternoon, I’ll make the starter up in the morning the day before. If I’m baking in the late afternoon or evening, I’ll make the starter in the evening the day before.
Making up the starter also means feeding the mother: you just took something out of the mother, now you’ve got to put it back in. Both mother and starter will need to be left alone out of the fridge to develop, after which you can mix up the dough. After the initial mixing, the dough rests. A serious first knead is followed by several turnings and rests. Once the dough has been turned a number of times, I let it sit until it’s more or less doubled in volume. Then I shape the dough, let it proof in bannetons, and bake. Finally, I always let my bread cool for half an hour—but ideally an hour or more—so that the steam stays inside. If I cut into a loaf in less than half an hour, I plan on finishing it within a day, so it doesn’t get stale.
Okay: how does it work? Throughout, I give concrete amounts. You can just halve all of the weights to get a procedure for a single loaf.
Making the starter
Take the mother out of the fridge.
Put 100g of the mother into your bucket. This is your starter.
Add 50ml of water to the mother and 50ml of water to the starter in the bucket. Mix each thoroughly with the silicone spatula.
Add 50g of flour (AP or bread) to the mother. Add 50g of flour (whatever you like) to the starter. Mix each thoroughly.
Put the lids back on for both the mother and the starter.
Let the mother and the starter sit out until they show obvious signs of fermentation. In hot weather, this could be as little as 3 hours—maybe less if it’s really hot! In cold weather, it’s probably overnight.
Return the mother to the fridge.
Your starter is now ready to be made into dough, but it could be returned to the fridge and still used profitably within 24 hours.
Mixing up the dough
If your starter was in the fridge, remove the bucket.
Add the 750ml water. On the East Coast, I’ve found 650ml to be the right amount. The water temperature will determine some of the fermentation speed: the warmer the water, the faster the fermentation. Never add water over 100℉.
Add the 20g salt.
Stir the starter, water, and salt with the silicone spatula. It doesn’t have to be completely homogeneous, but try to mix it well.
Add the 1000g flour. In your first few batches, I recommend sticking to white AP or bread flour. When using a mix of whole and white flours, I tend to add the whole first, since it’s thirstier and tends to clump more. You can prevent clumping by adding a bit of flour, stirring, and then adding a bit more.
Stir with the spatula until the dough is homogeneous and there’s no visible powdery flour.
Put the lid on the bucket.
Autolyse rest
The bread gets a moment to relax; the flour soaks up moisture.
Leaving the dough at room temperature, wait 20 minutes or up to an hour.
Kneading
The bread gets a thorough kneading and rest before going through a series of turns and rests.
Remove the lid from the bucket.
Wash your hands.
Leaving the dough in the bucket, mix the hell out of it. Reach in there and just really go for it. I’ll do a series of pinching maneuvers on one axis (say, left to right) and more pinches on the other axis (say, top to bottom). After a few pinches in either direction, I flip the bread over and keep going. I’ll knead for a few minutes—not longer than five minutes, but enough time to feel the dough start to come together beyond what the early mixing did.
Put the lid back on the bucket.
You’re gonna want to wash those hands again. If you have a septic tank, try to avoid getting the flour mixture down the drain—it can gum things up. O’Malley wipes his hands with a paper towel.
Wait 30min, then start the turns.
Turn, turn, turn
Here’s how to turn the dough:
Remove the lid from the bucket.
Wash your hands.
The bread is sitting in a round bucket, but imagine that it’s actually a square. You’ll fold each side onto itself. That is:
Reach in and grab the bread from one side. Pull it up and fold the bread on top of itself.
Reach in and grab the bread from the next side (say, clockwise). Pull it up and fold it on top of the already folded bread.
Reach in and fold the next side.
Reach in and fold the last side.
Reach in and under and turn the entire dough upside-down, so that your folds are on the bottom. If you work quickly while folding, there won’t be much sticking and it’ll be easy to flip the bread. Don’t worry if you feel like you’re mangling it—it gets easier. If trying to pick up the dough mangles it, give it another four turns and try again.
Put the lid back on.
Let the dough rest 30 minutes.
Repeat. Two turnings is the minimum; I’ll typically go for four. With each turning, the dough should take on more form, holding together better, standing more upright and sticking to the sides less.
Bulk fermentation
You’ll want at least two turnings before bulk fermentation starts. Bulk fermentation is a geologic process, with the usual trade off: time vs. pressure. Fewer turnings means more time in the first rise, while more turnings means less time in the first rise. Just like in geology, heat changes the equation, speeding things up.
I often let the dough bulk ferment in the refrigerator. This is called a ritard, because it slows down the whole process. That might seem like a bad thing, but it’s actually great. More time means more flavor! Plus, sometimes you just don’t have time to finish baking right now. Don’t worry: you can stop the dough at just about any time in the bulk fermentation and put it in the fridge. (If the dough is already moving fast, you won’t be able to buy that much time. But you can definitely buy some!)
Conversely, you can speed things up by, say, warming your oven to 200℉ for 10min, turning it off, and then letting the dough ferment in there. You’ll get less flavor, but it’ll happen on your schedule.
Let it sit until the dough doubles. In my 6qt bucket the 1000g bulk will sit just below the 2qt graduation before rising, and is ready to bake somewhere between the 3qt and the 4qt.
Shaping
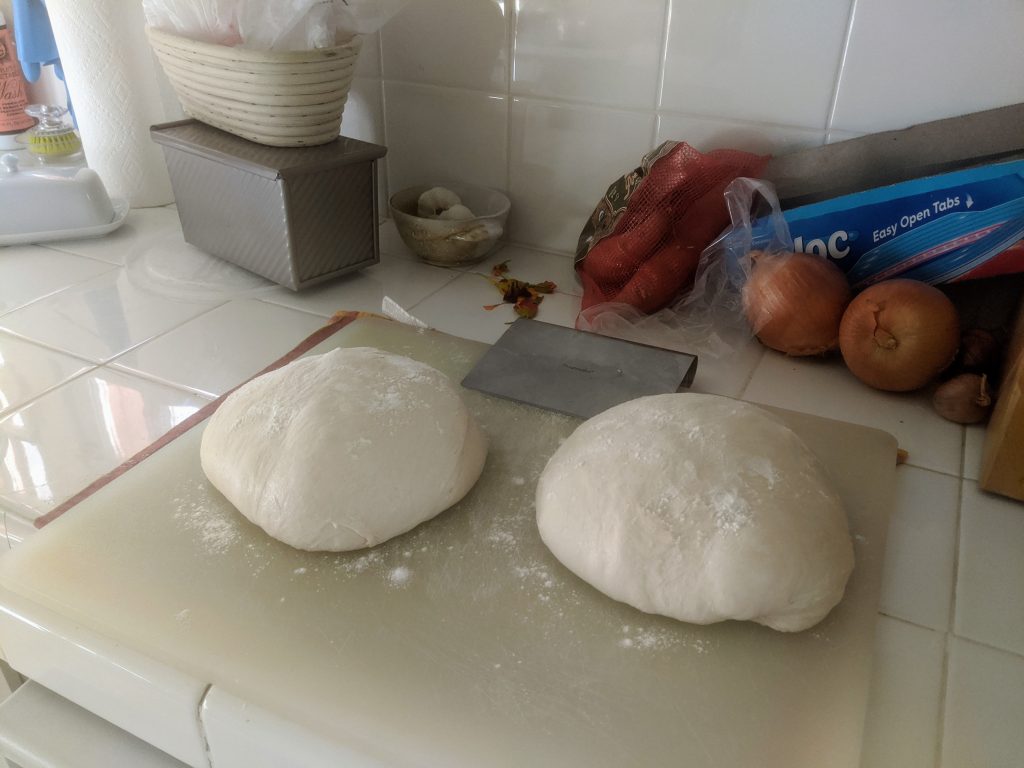
Giving the dough a ‘bench rest’ before shaping. 30min is great.
There are lots of ways to shape the dough. First, the general idea.
Flour whatever bannetons you’ll be using with the 50/50 AP/rice flour mixture. You don’t need much, but if your dough sticks when unmolding, use more flour next time.
Use the soft scraper to pour the dough out onto the cutting board. I don’t normally flour the board first.
Using the hard bench scraper, split the dough into two roughly equal sections. If you totally misestimated, no worries: just cut a bit off the bigger one and glom it onto the smaller one.
Lightly wet the bench scraper. It should be damp but not actively dripping; I run it under the faucet and then briskly shake it off.
Shape the first loaf into a round. That is:
Use the scraper to fold the dough onto itself (say, front to back).
Use the scraper to refold the dough onto itself again, in the opposite direction (say, left to right).
Holding the bench scraper vertically, bring its flat side towards the dough and drag it around clockwise anywhere from a quarter to a three-quarter turn. (Go counterclockwise, if you’re left handed.) Keep pressure towards the center of the dough as you go around. This should have the effect of shaping the dough into a round. You can also do this step with your hands, but using the scraper means less handling, which leaves more gas in the bread.
Repeat until the dough is starting to ball up nicely. Not more than five.
Repeat steps 4 and 5 for the second loaf.
Let the dough “bench rest” for up to 30min.
If you’re using a banneton, loaf pan, or other bread former, put it in now. (Instructions below.)
Check the banneton to make sure the dough will unmold: with wet or floured hands, pull up on the loaf to make sure it isn’t sticking to the ribs of the banneton. If it is, pull back the dough and sprinkle in a bit of banneton flour where it was touching. You can preemptively sprinkle a bit on the dough just off the edge where it touches the banneton, too—as the dough rises during proofing, that will be the part that pushes out and could stick to the banneton.
Cover the bannetons loosely—make sure the covering won’t touch the dough, even as it rises. Plastic grocery bags are good for this, since they’ll stand up on their own.
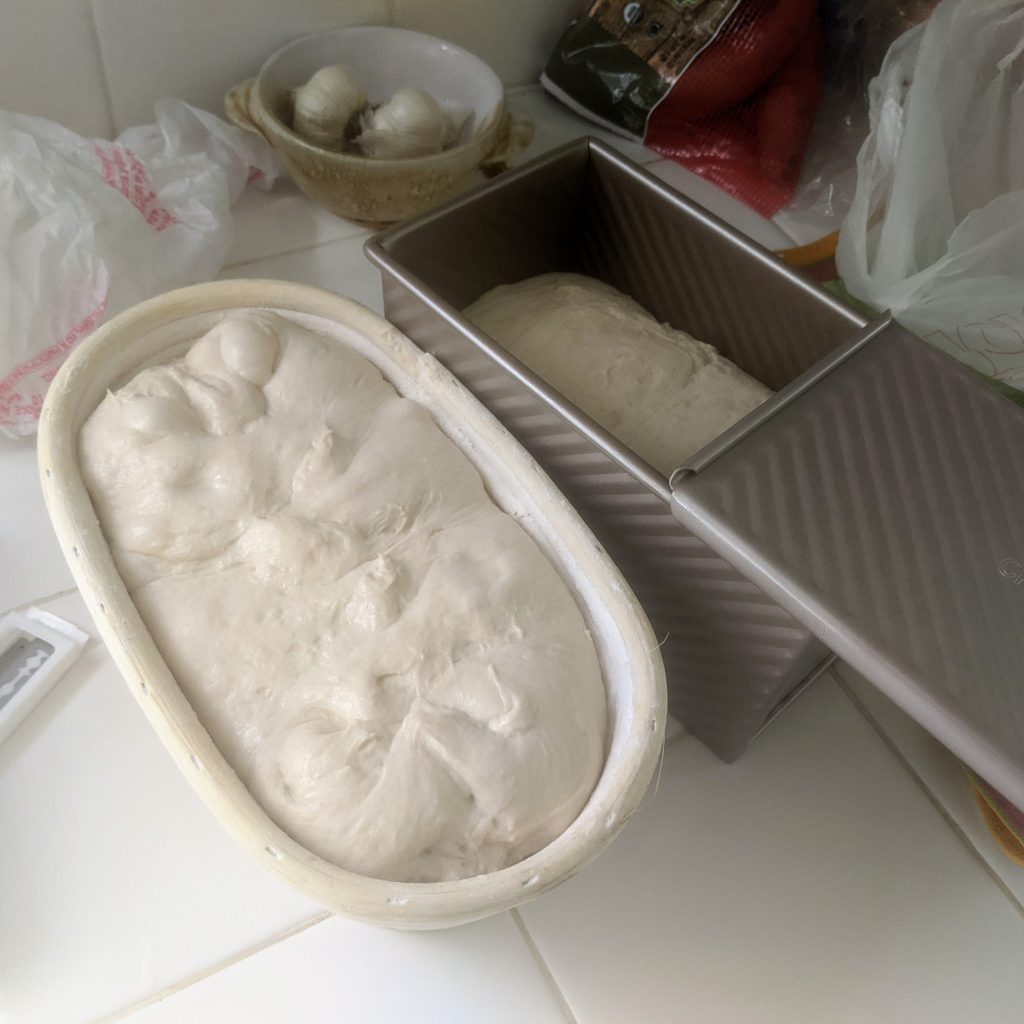
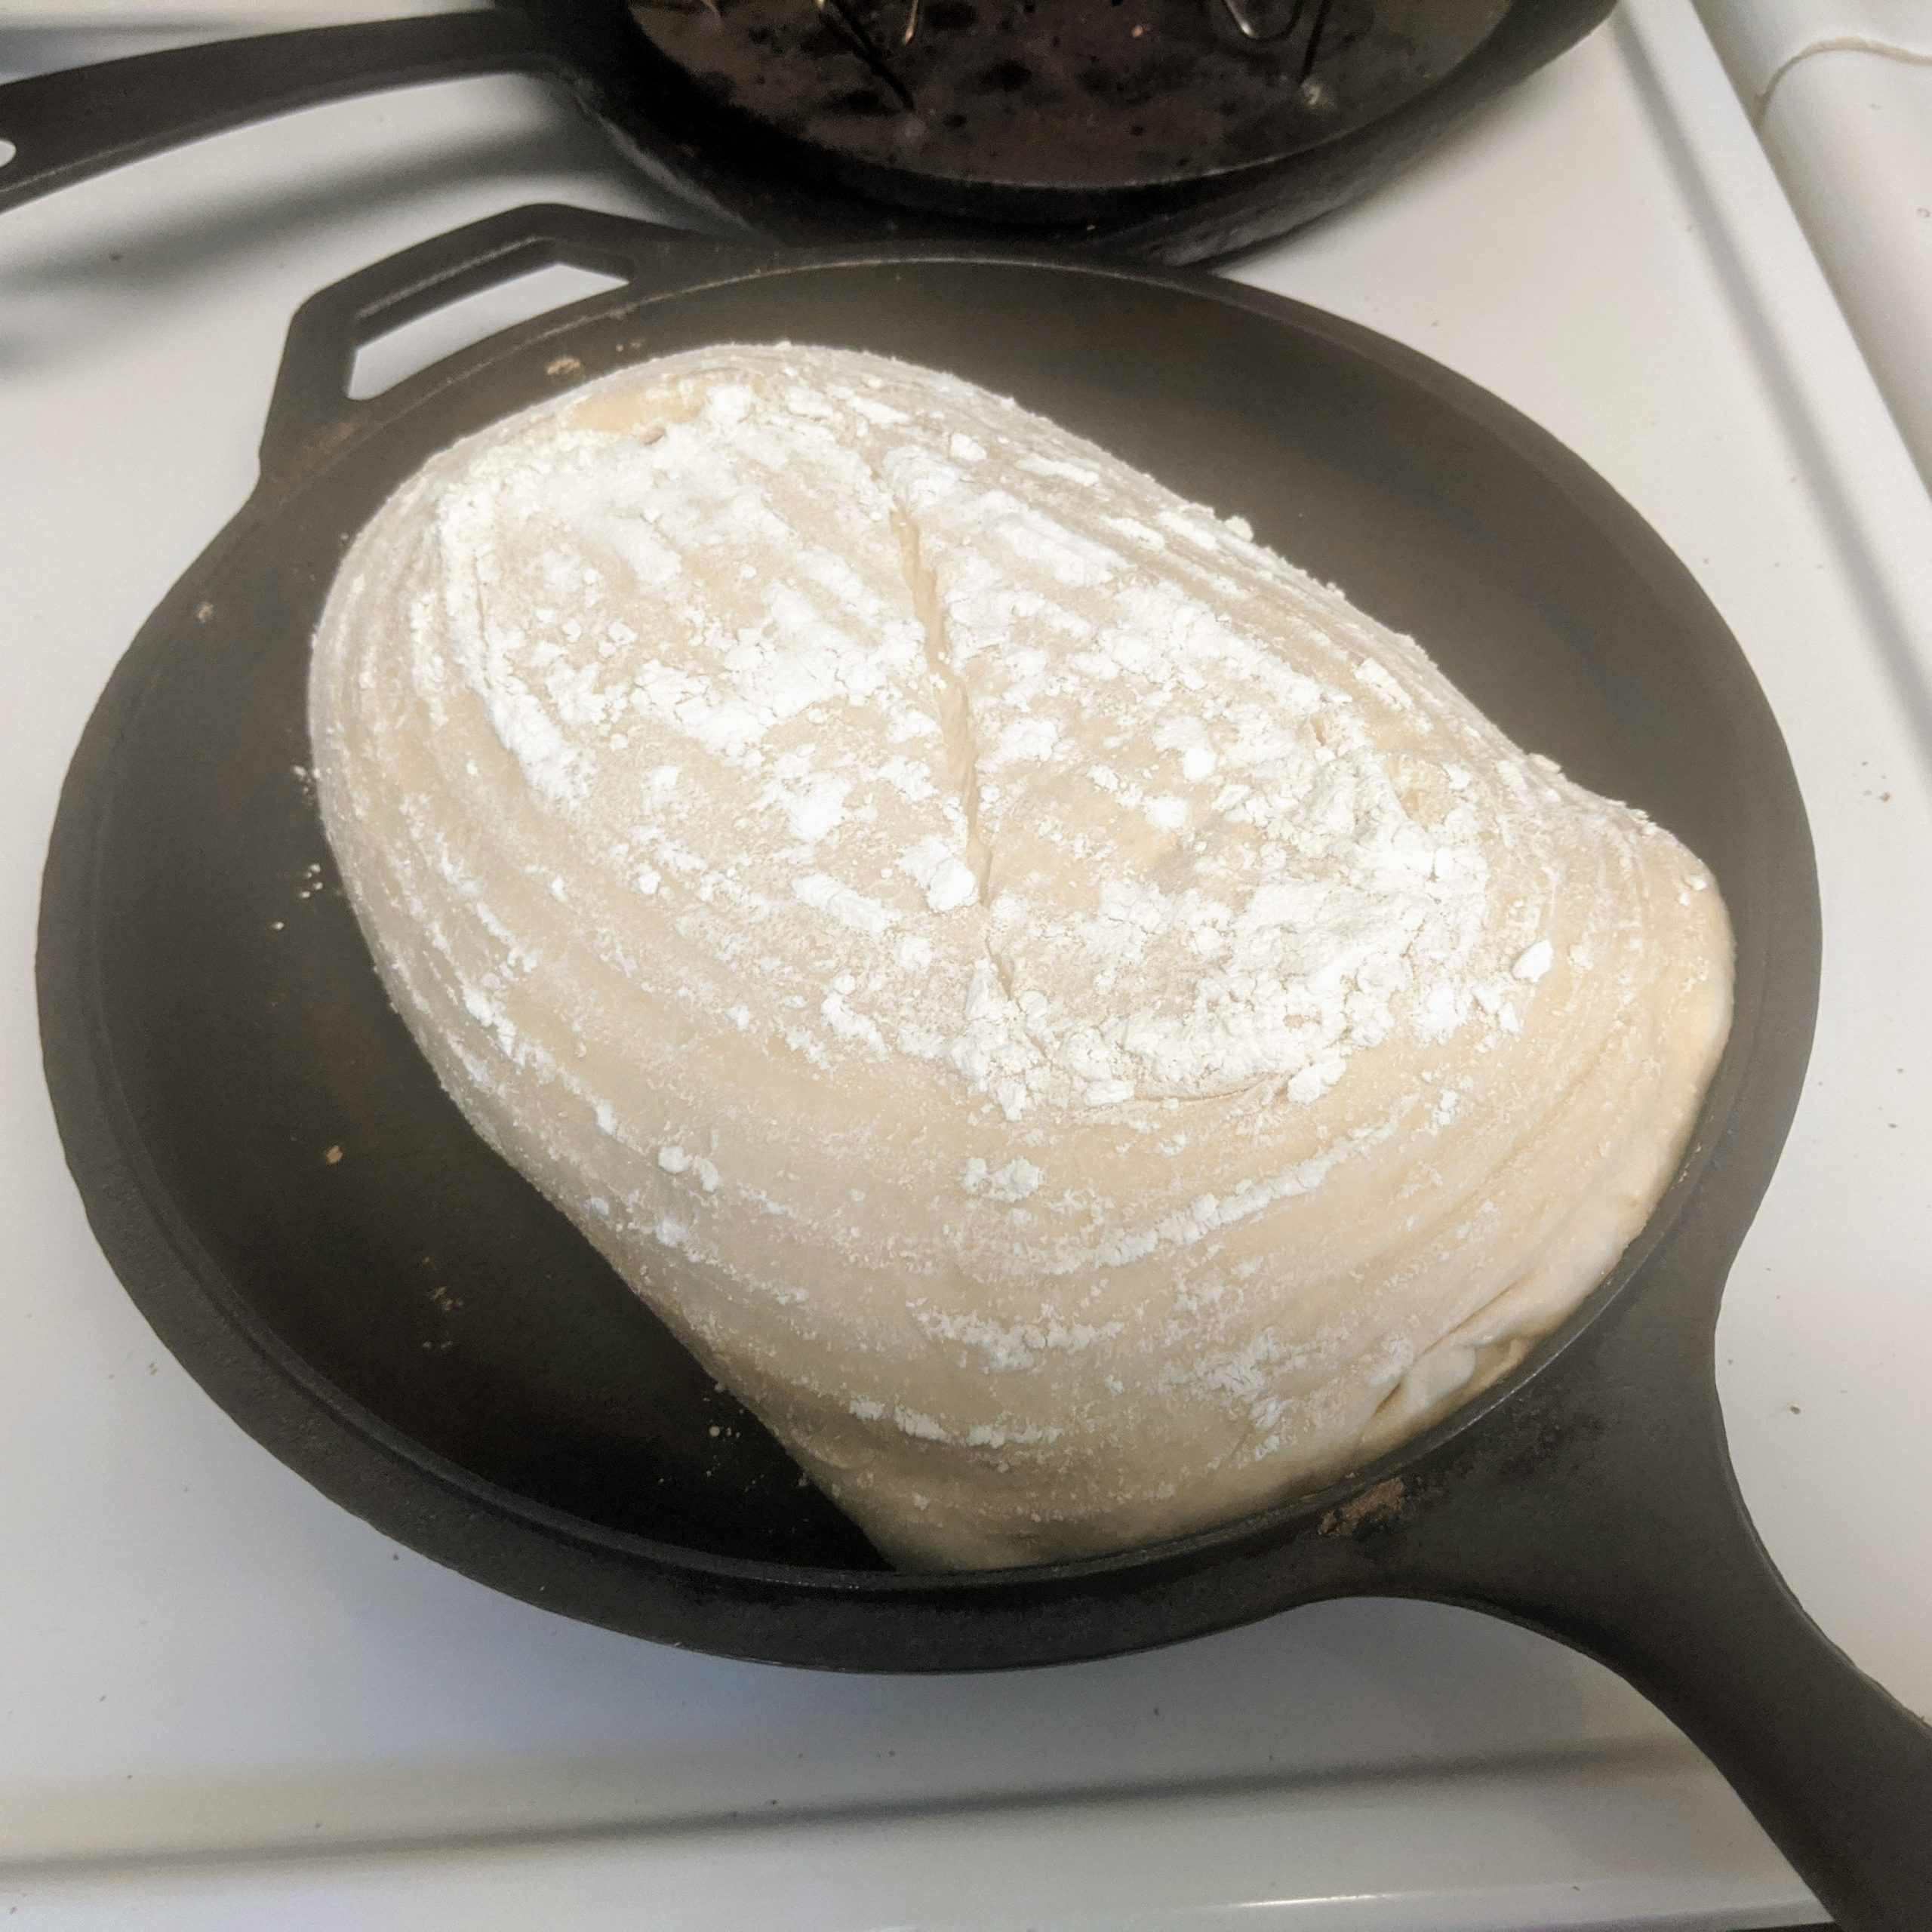
A bâtard and a Pullman loaf start their proofing time.
Here’s how to shape for round bannetons and for oval, bâtard bannetons.
Round bannetons
Do 10 or so turns around the dough, trying to stretch the outside of the dough a little. Re-wet the bench scraper as needed.
Slide the bench scraper under the dough ball. Using the scraper and your off hand, invert the dough into the banneton (gently!).
Oval bannetons—shaping for bastards
Sprinkle a bit of AP (or other wheat, or rye) flour on top of the round.
Slide the bench scraper under the dough ball. Using the scraper and your off hand, invert the dough onto your board. As you transfer it, try to deform it into a slight oval. I form it with the long axis from 12 to 6 on an imaginary clock while standing at 6 o’clock, but you can do it with the long axis from 9 to 3; whatever works for you.
Stitch up the dough. With your right hand, use your two forefingers and thumb to grab a bit of dough from the left towards the top of the oval and stretch it over, pressing it onto the right side. Then use your left hand and grab a bit from a bit below where you pressed in the last ‘stitch’; press it onto the left side. Repeat until you’ve ‘sewn’ up the loaf.
With a hand at the top and the bench scraper at the bottom, pick up the dough and gently transfer it into the banneton.
Loaf pans—shaping for sandwich lovers
I quite like using Pullman loaf pans to make bread with a lovely, square profile—or, without the lid, to make a beautifully domed loaf.
Stretch the dough into a rectangle a little longer than your pan and about half again as wide.
In order to have a uniform crumb, de-gas the bread: aggressively pat the rectangle all over.
Roll the long edge of the dough about 1/3 of the way towards you.
Fold the short edges over.
Pull up the other long edge, pinching the seam shut.
Place seam side down in a Pullman loaf pan; cover with lid, if you like.
Proofing
Shhh! They’re resting.
Proofing is a second rise. It can take as little as 30min (a hot day when your dough more than doubled and the starter’s been fed recently) or several hours (a cold day when your dough didn’t quite double and you heavily worked your dough during shaping).
Let the shaped loaves sit in the bannetons until they’ve adequately risen. This is the hardest part to explain. A good test is that a wet finger depressed half an inch into the dough gets a slow, even rebound. Fast rebound needs more time, no rebound means overproved. But… the loaf in the video below has only the slightest rebound, but it was a tiny bit underproved.
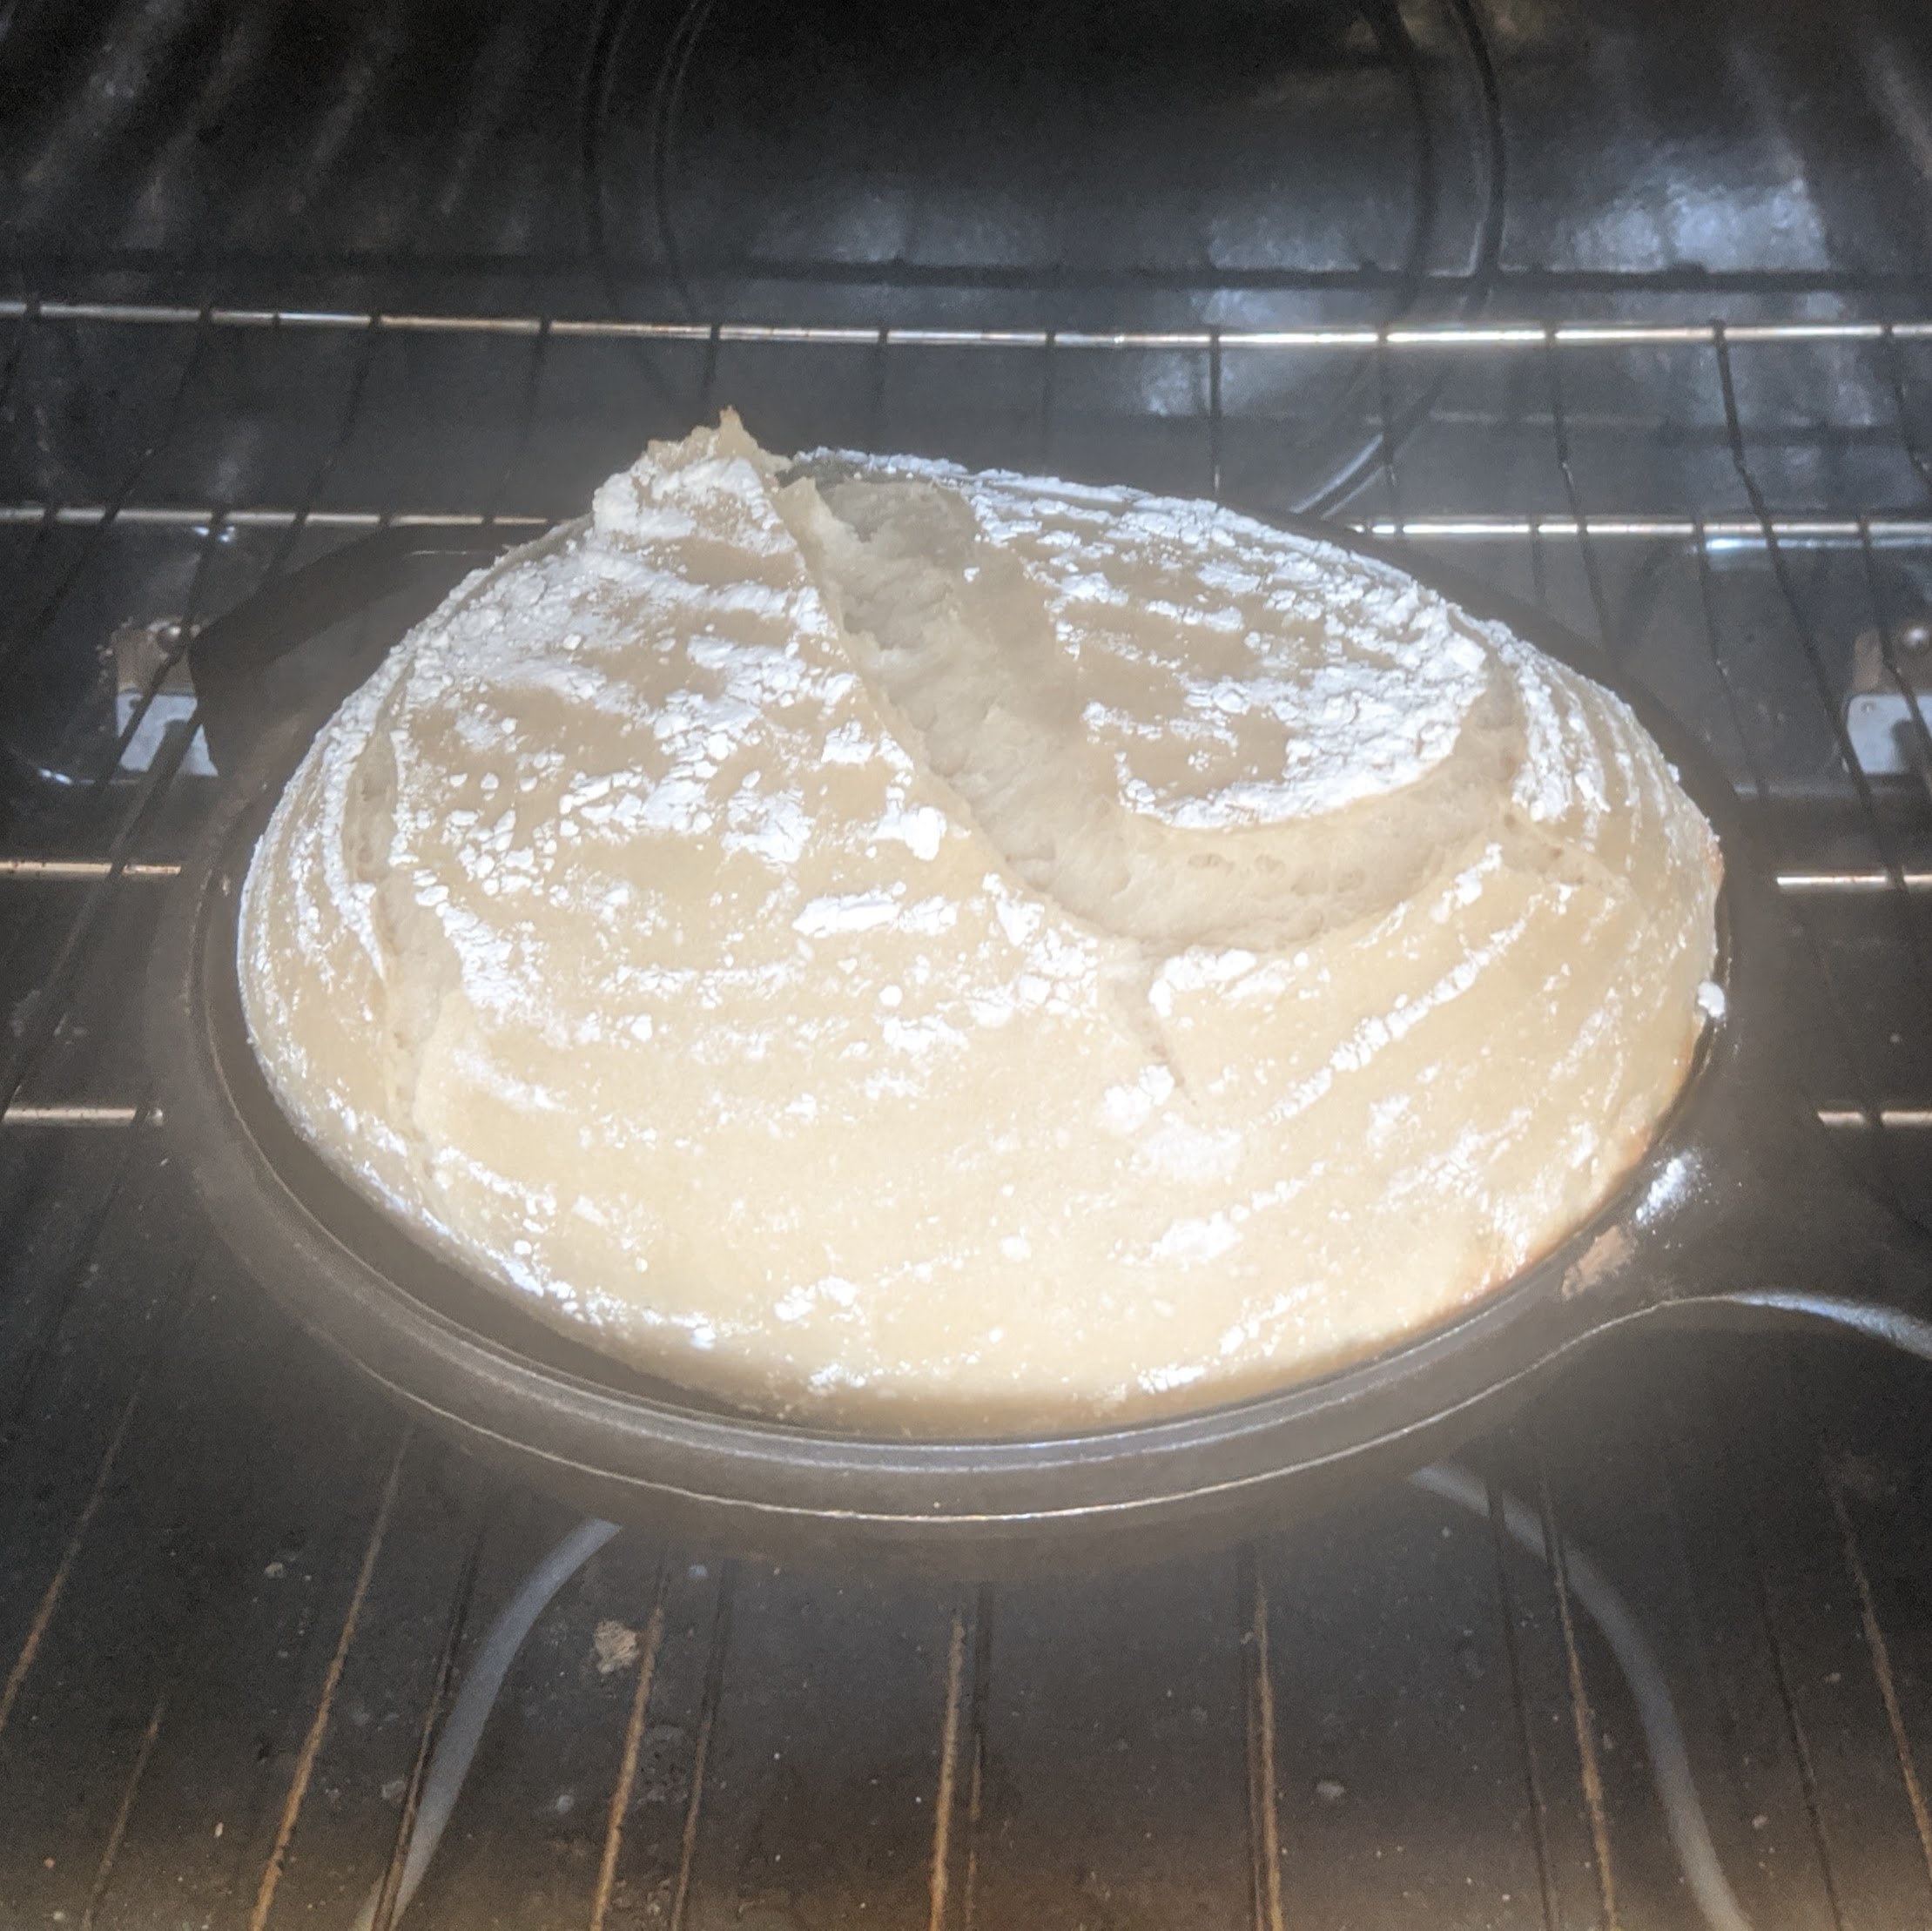
Put combo cookers into an oven set to 425℉. I find it takes about 30min to get the pans up to temp. It’s hard to know when to start the oven: you want the oven to be ready the moment the loaves are fully proofed. I’ll start the oven when the dough’s rebound is still strong but starting to slow down.
You can prove effectively in the fridge, too, though the rebound effect will be even harder to read. Bread that’s been risen and proofed entirely in the fridge will have subtle bubbling all over the crust and a nice tang (cool temperatures favor the bacteria over the yeast). You can put fridge-proofed loaves right into the oven or let them sit on the counter for a bit.
Baking
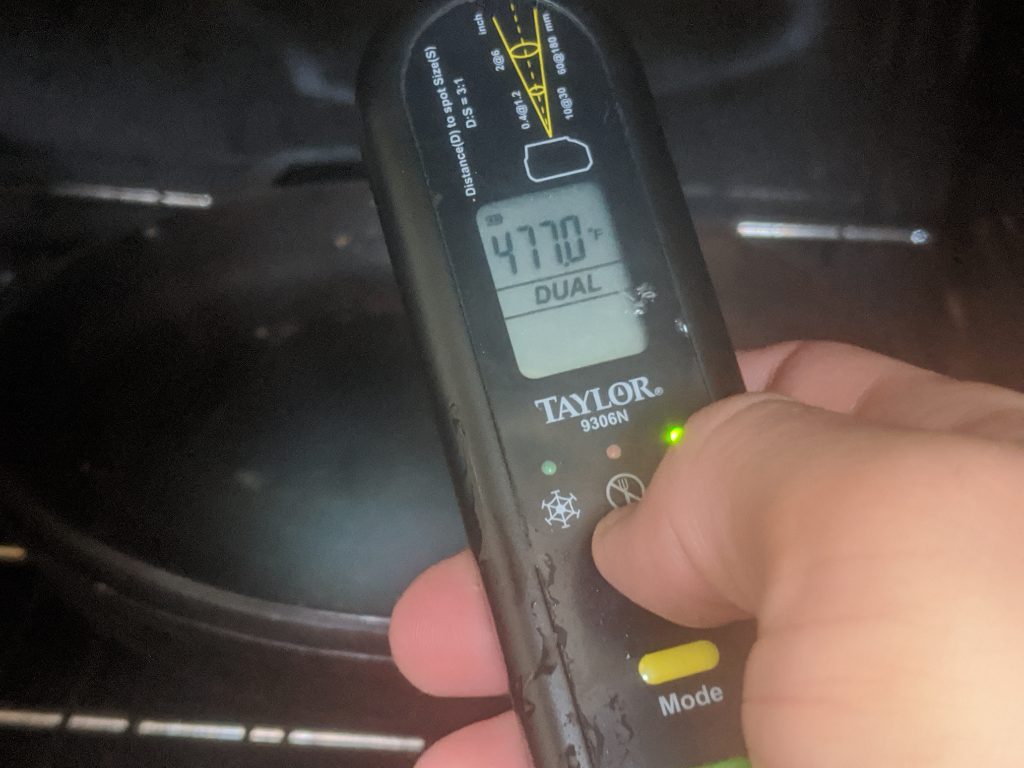
If your proof has been very brief, make sure that your combo cookers
are hot (400℉ or greater). An infrared thermometer is good for this.
Infrared thermometers are a huge boon.
Remove the plastic bag covering one of the loaves.
Check to see that the dough will unmold. With damp or floured fingers, see if you can pull the edges back from the banneton. If it’s sticky, pull it back and touch it up with a bit of banneton flour (and use more banneton flour next time).
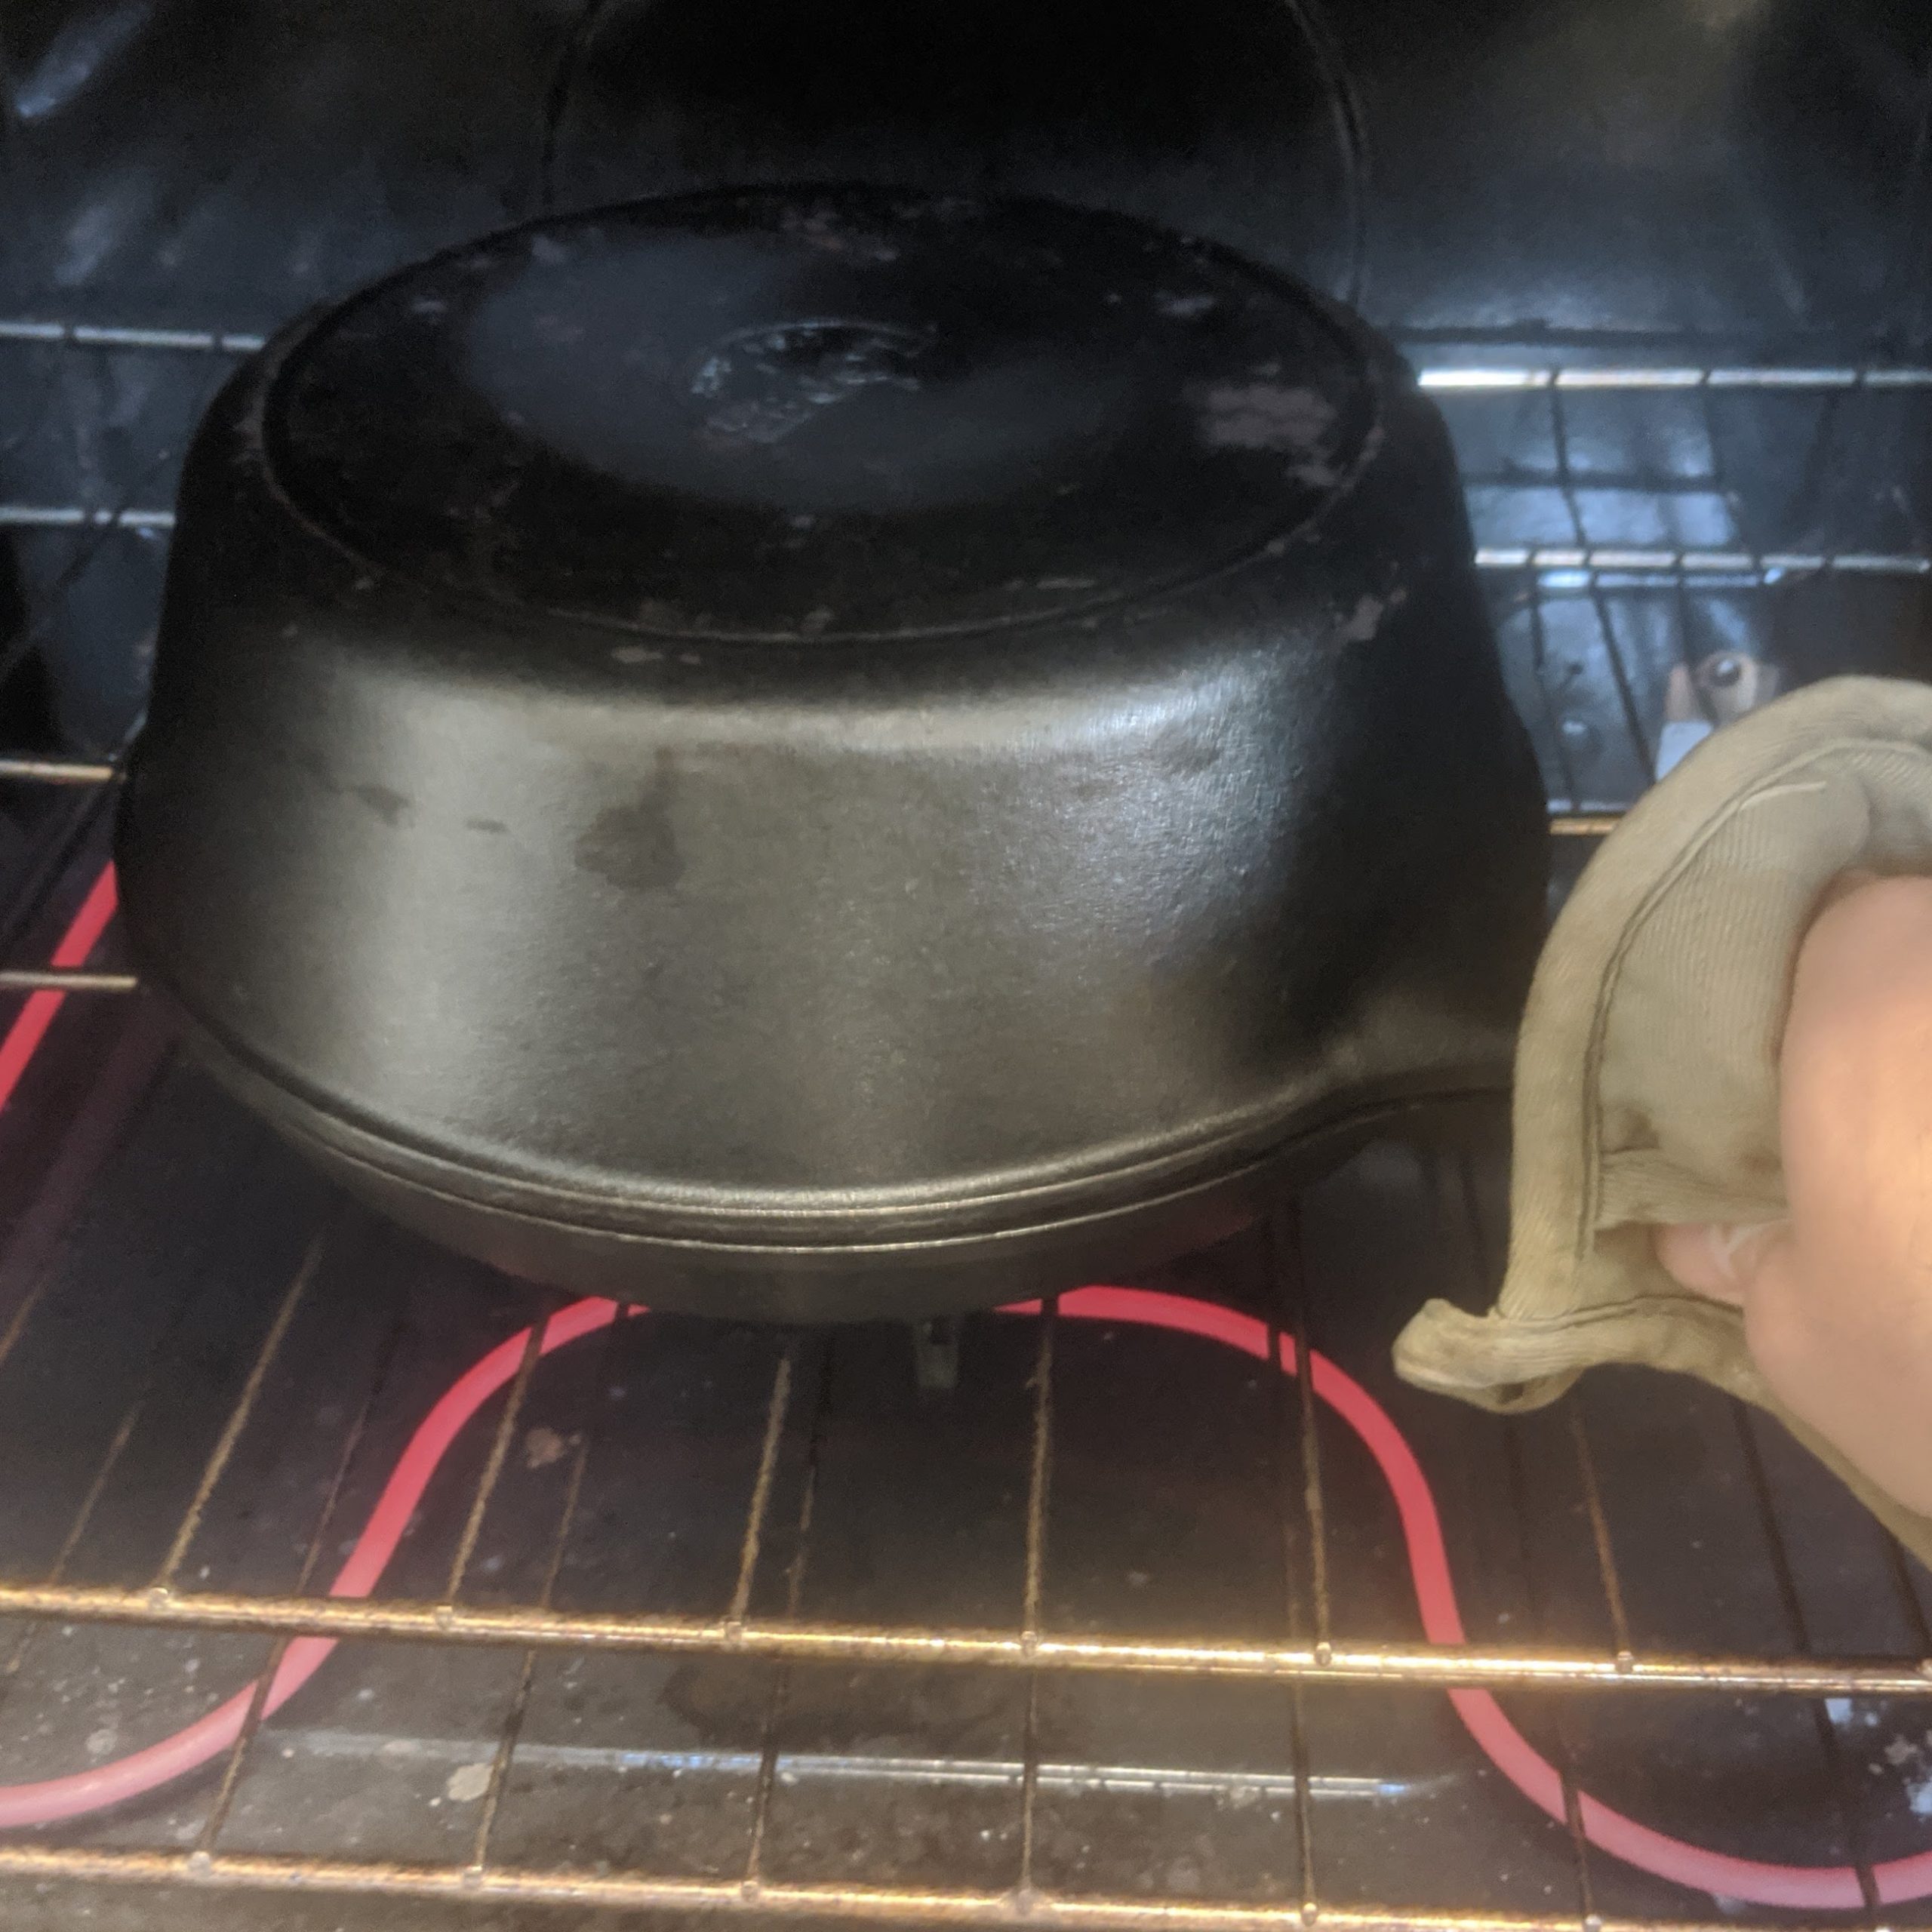
Remove a combo cooker base and lid and place them on top of the oven. Don’t forget to use oven mitts… those pans are hot!
Unmold the loaf into the base (the shallow part). You can do this with a ‘tip and flip’, or you can put the banneton down on the counter, invert the combo cooker base on top, and then flip the lot. Your banneton will be fine with the heat of the pan—it’s only a second or two. If the dough sticks in the banneton, give it a few good taps. If that doesn’t unmold the bread, start to lift the banneton, rotating it around a bit as you go to loosen the lot. You may have to reach in with your fingers—be careful not to burn yourself.
Slash the dough. I’ve had poor luck with a lame, so I use a safety razor bare-handed. (A sharp knife works well; bread knives tend to do a good job.) Be careful! If the dough is perfectly proofed, you can do a number of a nice slashes: an X, three horizontal, a leaf, etc. If the dough is over- or underproofed, make smaller and fewer slashes.
Put the lid on the combo cooker base and put it in the oven. You may need to use two hands.
Do the same for the other loaf.
Set a timer for 15min.
When the timer goes off, open the oven door and remove the combo cooker lids.
Bake until the loaves are done, another 20-45min. Go by color and smell. Breads with whole wheat are particularly good with a touch of singe on the ears. After a few minutes of cooling, I brush off and then stack the combo cooker lids.
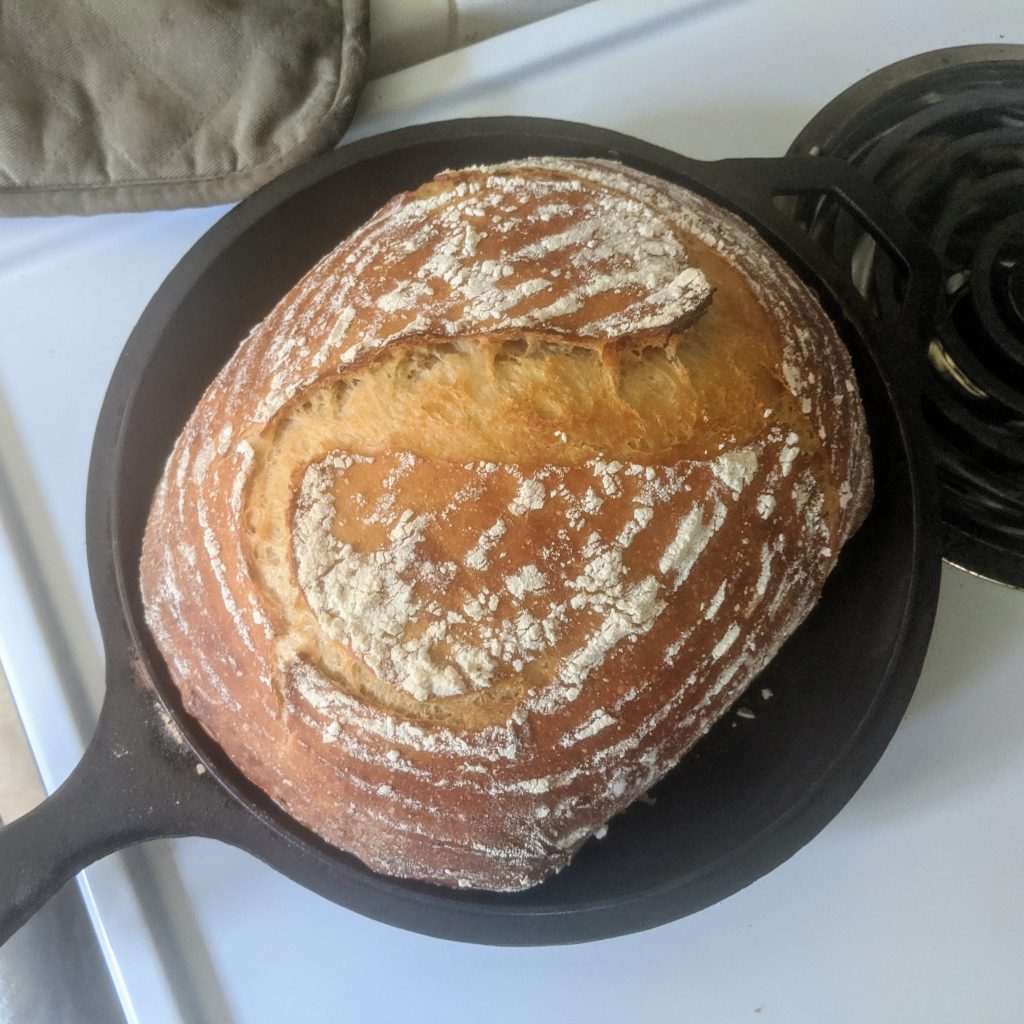
Cooling
Turn off the oven.
Pull a combo cooker base from the oven.
Remove the bread from the pan using a metal spatula. Using the
spatula upside-down will let you get your hands on it. (You may need
oven mitts.)
Put the loaf on a cooling rack.
Set the base on top of the lids.
Repeat for the other loaf.
Do not cut into warm bread. It’s not done cooking yet! If you cut into it now, you’ll lose too much moisture and your bread will have a dry, spongy texture (instead of the light, fluffy one you want!) and go stale quickly. If you’re going to completely finish the loaf the day you bake, though, knock yourself out.
Cleaning up
I never really clean my bannetons, but I’ll pick off crusted-on dough. Everything else should be cleaned thoroughly.
Wash the silicone and metal spatulas, board, bench scraper, and bucket lid immediately after using them.
Once they’re fully cooled, scrape off any burned-on bread from the combo cookers and wipe them down with a damp cloth or paper towel to remove any flour. Make sure they dry completely—I either leave them out for a few hours or put them back in the warm oven with the door open for a few minutes.
Leave the bucket and the soft dough scraper out to dry overnight. When the leftover dough is fully dried, it should flake off easily. Put the flakes in the trash rather than clogging your drain, then wash the bucket and the scraper.
Playing around
Start out just using AP or bread flour. I’ve come to quite like 40% Grist & Toll flours (3:1 Sonora and charcoal wheat) and 60% AP, but play around. I’ve used just about all kinds of wheat flour in bread, but plain AP yields a nice, tender, white crumb with a thin, crispy crust. Plain bread flour will develop a bit more gluten for a firmer crumb and thicker crust. European breads baked with bannetons tend to be baked with lower protein flour, while American bread flour is really ideal for free-form, sturdy country loaves. I like to incorporate stone ground whole flour, like that made by Grist & Toll or other small mills, and I’ve also included “00” a/k/a doppio zero and durum flour. You can go 100% whole or 100% white or anything in between. You can include pastry flour, too, for that tender crumb.
You’ll have to play with hydration levels. Whole wheat is thirsty, and Grist & Toll flours are very thirsty. I’ll go above 80% hydration when using a lot of whole wheat. I go as low as 60% when baking on super-humid Martha’s Vineyard.
There’s a certain feeling to getting the hydration just right. Sticky, cookie-like dough means you’ve not got quite enough water in it. Sloppy dough that doesn’t gain structure with each turning is too wet. You’ll have to play around with the flours you use, how vigorously you knead and turn, the ambient temperature, etc. You’ll know when you’ve got it right, since the dough feels just great.
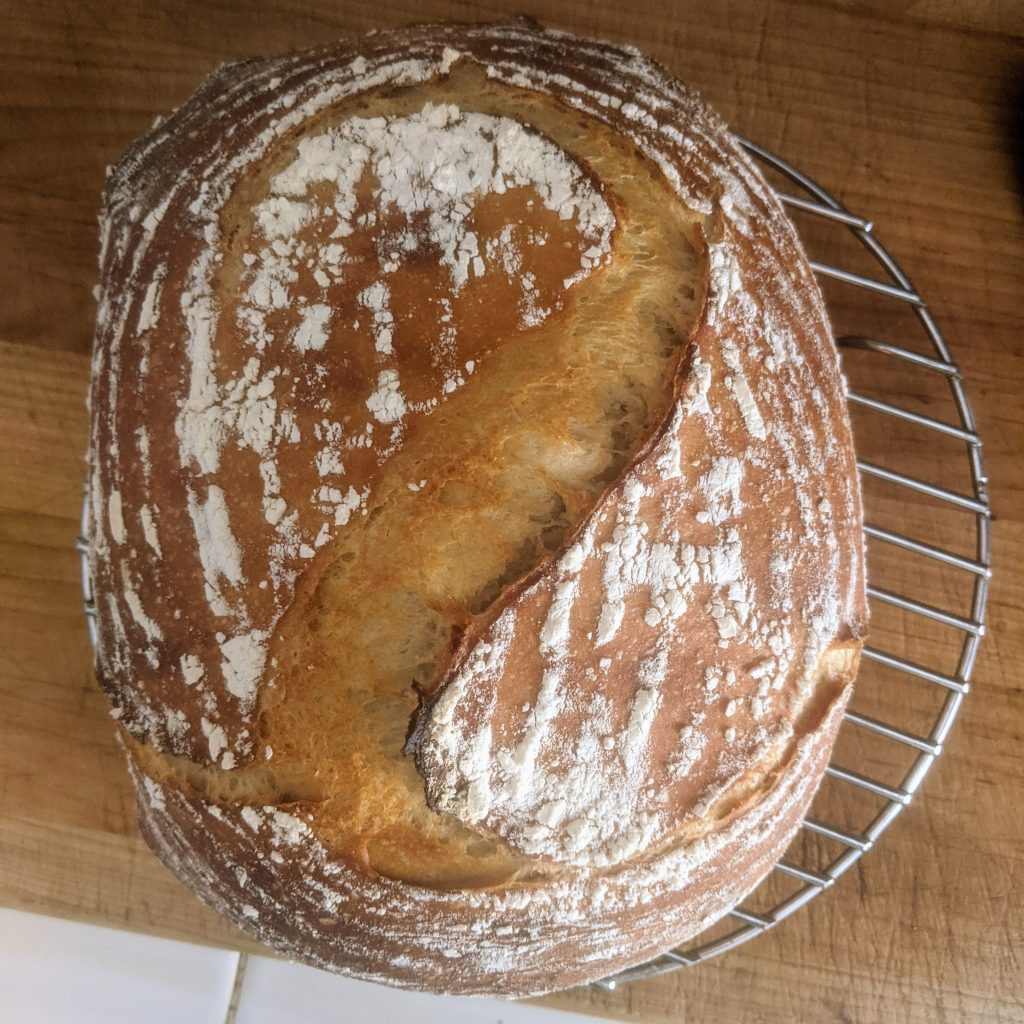
You’ll know when you’ve proved correctly because of the excellent oven spring with beautiful ears and a nice clear dome. That is, the loaf will be substantially larger than the dough you put in the oven, the slashes will have grown craggy and sharp, and the top of the loaf will have risen not just up, but out.
Don’t feel bound by my particular strategies for kneading or turning. Use whatever method you like, though I’d caution you against overhandling the dough. If you want a nice, big loaf with a beautiful rounded top and an open crumb, you need to be very gentle with it. Don’t knead on a board unless you want a tight crumb for sandwich bread.
Play with shaping! For a while I was shaping by hand, where I’d form a boule, gather up the craggy ends on the bottom, and then put those directly into the banneton without inverting. That is, I’d form a boule and the ugly bottom of the round would become the top of the loaf. It was erratic and craggy… fun! I’ve also been happy with using lidded Pullman pans to bake sandwich bread. Checkout The Perfect Loaf’s recipe for Pain de Mie for info on loaf pans and shaping.
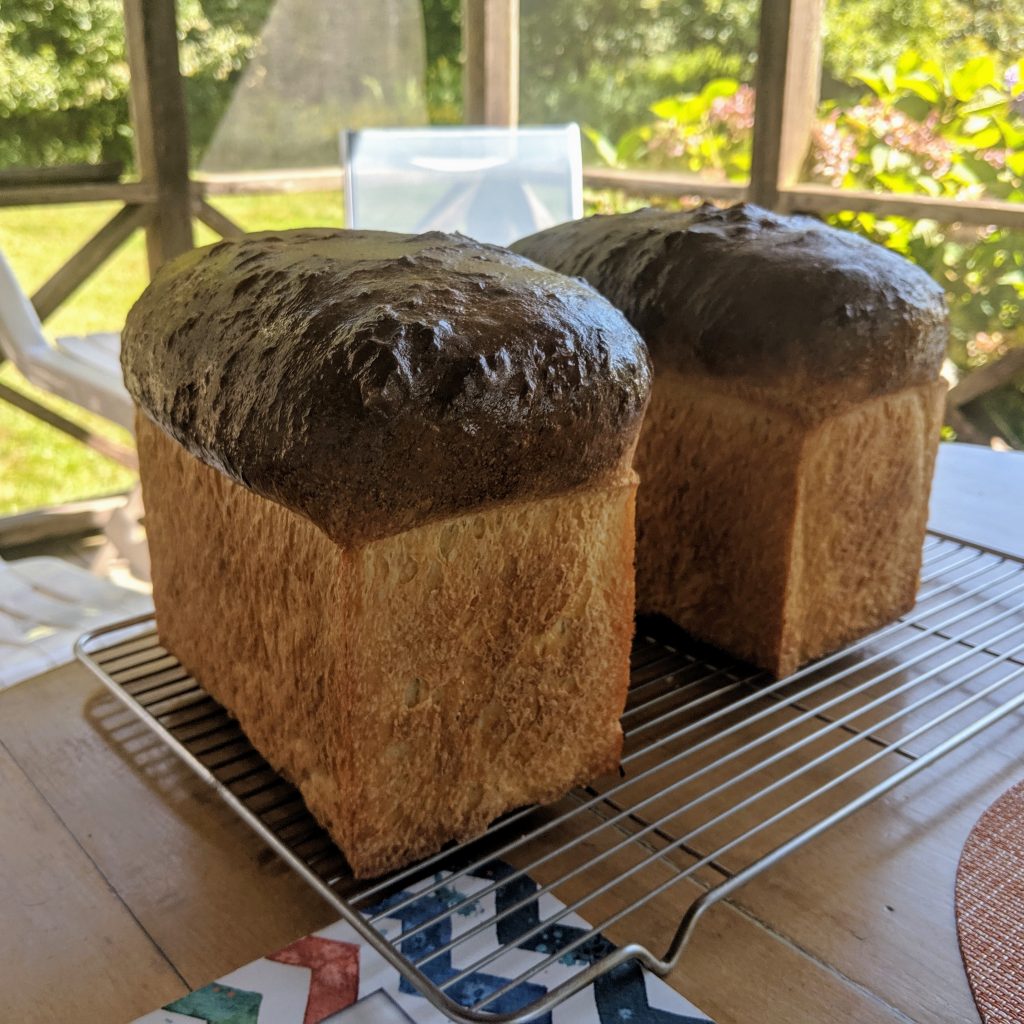
Pullman loaves, cooked with the lid off, tops rubbed with butter. I added 20g of non-fat dry milk with the salt. Try replacing some of the liquid in the dough with milk (leave water in the starter). Add some melted butter, or 20-50g of honey.
It’s tricky to control how sour the dough is. The longer the mother sits between feedings, the more sour it’ll be. The colder it ferments, the more sour it’ll be. But I’ve had poor luck trying to control it, and I suspect that my starter is just mellow and yeasty. Your starter will adapt to whatever environment and treatment you give it.
If you’re just feeding, try using the starter to make waffles or pancakes. I’ve made hamburger buns, pizza, and focaccia with great success, too. You can take just about any recipe with yeast, drop the commerical yeast and add in 20% starter (in baking percentages!). That is, if your conventional-yeast recipe calls for 500g flour, you’ll want 100g of starter instead of the conventional yeast. That starter will have 50g of flour (25g from the mother, 25g added) and 50ml of water (25ml from the mother, 25ml added). You’ll want to deduct those quantities from your recipe to account for their presence in the starter. To make your converted recipe, just treat the starter like you would the yeast. Be patient, but it should be great!
Don’t feel bad about wasting flour during feedings. Worst case, the leftover starter is great for compost.
Troubleshooting
If the crumb is too tight, the dough is most likely overworked and underrisen/underproofed.
If the dough doesn’t seem to rise, try waiting longer. Sluggish mother means sluggish starter. Regular baking and feeding help.
If there’s a seam of undercooked dough near the bottom of the loaf, your dough was too cold and probably underrisen and/or underproofed.
Underrisen and underproofed, with a sluggish mother. Dense… but still bread!
If the loaf busts open new ‘ears’ or, worse, tears during the oven spring, you didn’t slash deep enough and you may have underproofed. If your slashes went flat, your dough was under- or over-risen, under- or overproofed, or you slashed too deep.
Also: it’s gonna be fine. Even your worst breads will usually be edible. (If you accidentally leave out the salt, mix salt and chilli flakes into olive oil, dip your bread into it, and pretend you’re in Tuscany.)
Yes, I know, we should have included Vya. There was a real mix of tasters: Dave, Hannah, and I are serious cocktail folks; Tessie is a serious appreciator; and Michael and Kari are serious about wine but new to vermouth.
We tasted in two phases: first, we tasted each vermouth alone in a glass (with optional ice); only Hannah knew which was which. Once we’d narrowed down the range, we tasted a few in Negronis.
The Vermouth Stands Alone
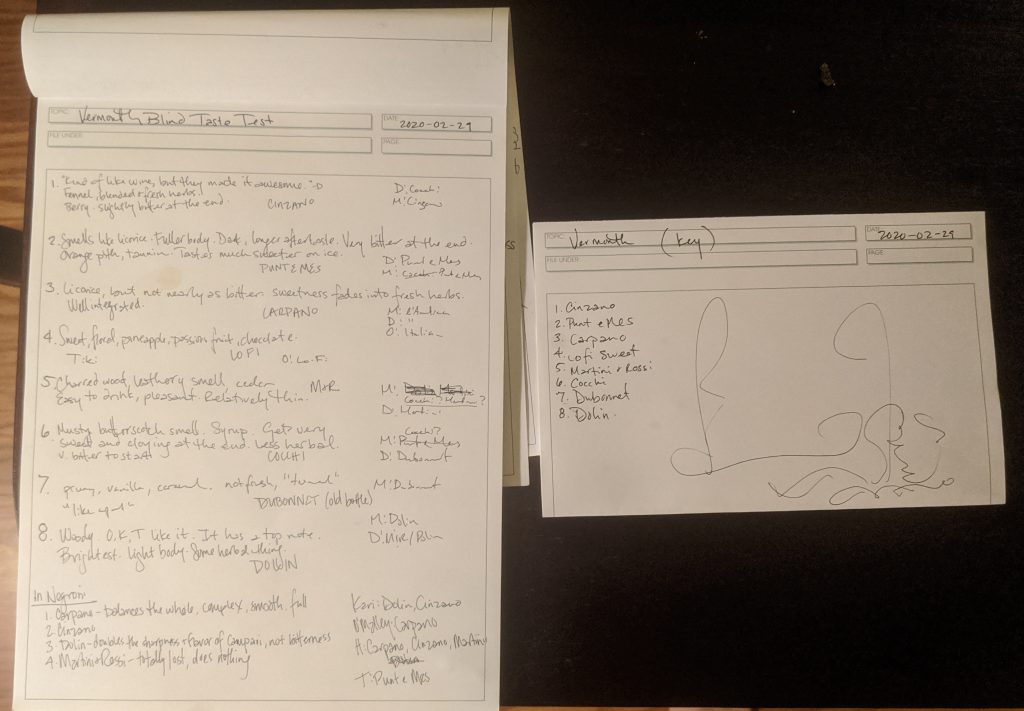
Here are the tasting notes from the first phase, in the order we tasted:
Cinzano
“Kind of like wine, but awesome” –Dave Fennel, blended and fresh herbs. Berry. Slightly bitter at the end.
Punt e Mes
Smells like licorice. Fuller body, dark. Longer aftertaste, very bitter at the end. Orange pith, tannin. Tastes much sweeter on ice.
Carpano Antica
Licorice, but not nearly as bitter; sweetness fades into fresh herbs. Well integrated.
Musty, butterscotch smell. Syrup. Gets very sweet and cloying at the end. Less herbal at the end, very bitter to start.
Dubonnet
“Turned” –Michael “Like a port” –Kari Pruny, vanilla, caramel. Not fresh.
Dolin
“Ok, I like it” –Tessie Woody. It has a top note. Brightest of them all, light body, some herbal thing.
We later discovered that Dave had kept the Dubonnet Rouge bottle at room temperature for over a year, so turned is right! Keep your vermouth in the fridge, folks.
Careful notetaking is a must… especially when booze is involved!
Better Together (In a Negroni)
We selected four to make Negronis out of: Carpano, Cinzano, Dolin, and Martini & Rossi. We used Old Tom gin and a 1:1:1 ratio, no extra citrus. Our notes:
Carpano
Balances the whole. Complex, smooth, full.
Cinzano
[no notes]
Dolin
Doubles the sharpness and flavor of the Campari—but not the bitterness.
Martini & Rossi
Totally lost, does nothing.
So the bad news is that Carpano is pretty clearly the crowd favorite, but also pretty clearly the most expensive vermouth you’ll find! But the good news is (a) they sell half bottles, and (b) folks liked others, too. Kari liked Dolin, too; Hannah liked Cinzano and Martini & Rossi; Tessie enjoyed Punt e Mes.
A final word about the Lo-Fi sweet and dry vermouths: they are absolutely unlike any other vermouth I’ve ever had. Just crazy town, all over the place flavors. I can’t imagine drinking the sweet on its own, but I can imagine using the crazy tiki flavors in both of their vermouths as accents in cocktails.
Rosa rugosa, the beach rose, is found all over the beaches of the Northeast. It’s an invasive plant, but it makes up for crashing the party with its showy flowers and its edible fruit. The fruit itself is slightly insipid beyond a certain vitamin C tartness—something to snack on as you stroll, but nothing special. But when made into a syrup, the sweetness brings out a delicious flavor that reminds you: Rosaceae is the family of apple trees.
The whole plant. These are paler than the ones I foraged.
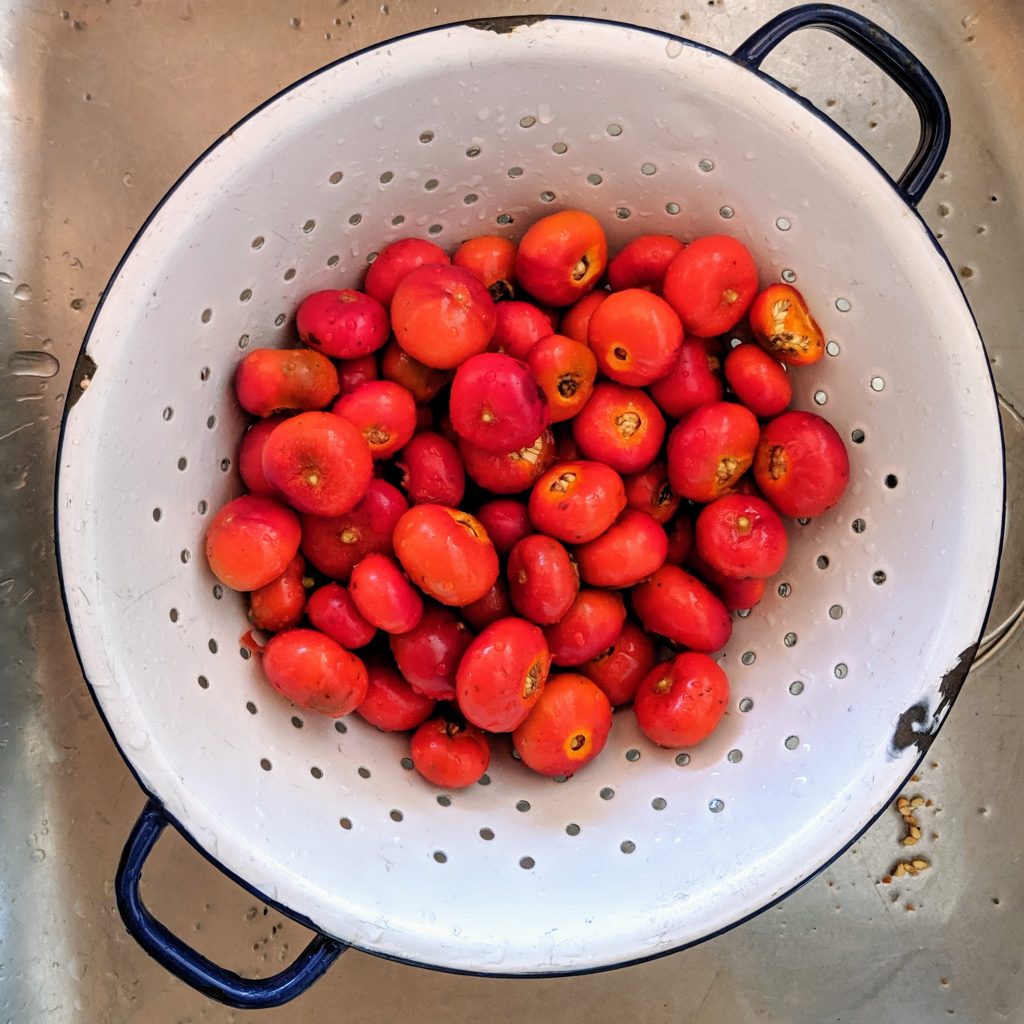
Following a River Cottage recipe, I made syrup from some beautifully red rosehips I foraged this morning. The process is simple. First, clean and wash your rosehips.
Trimmed rosehips in a colander.
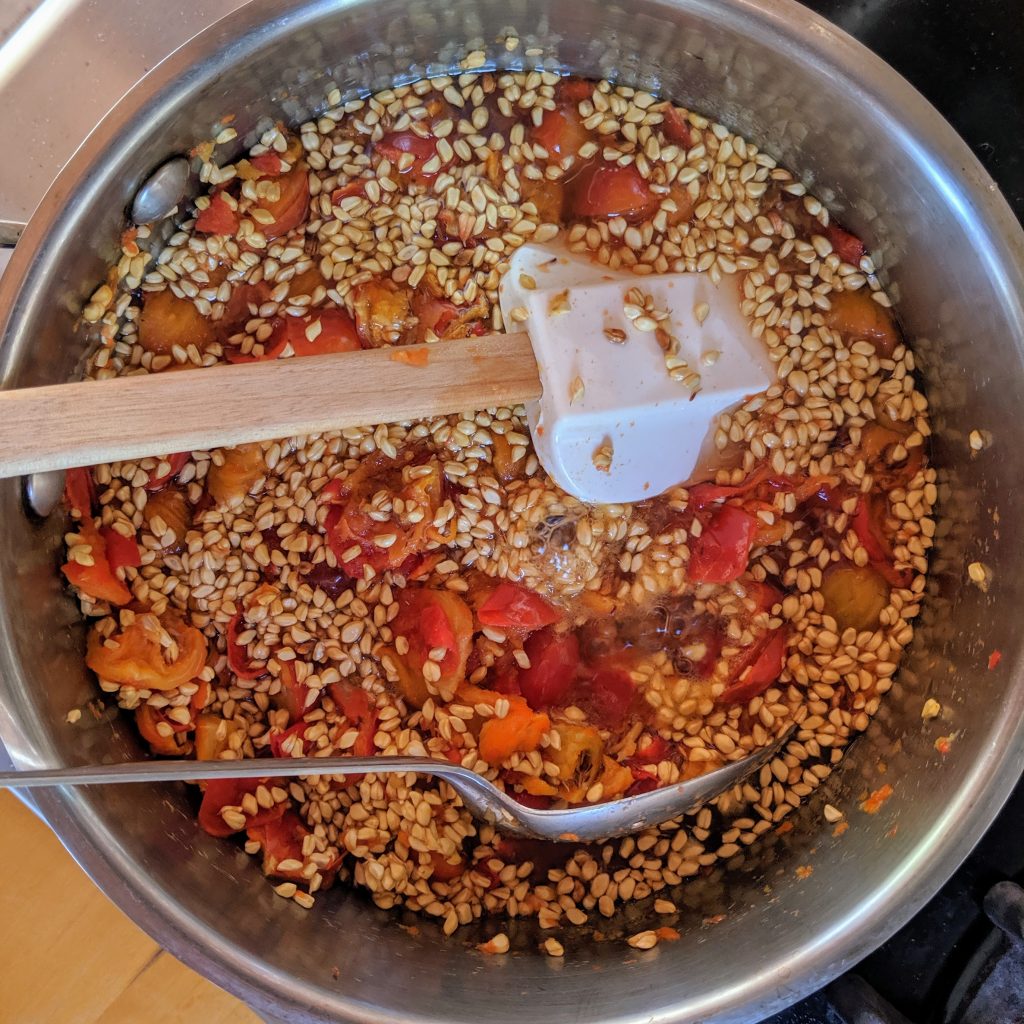
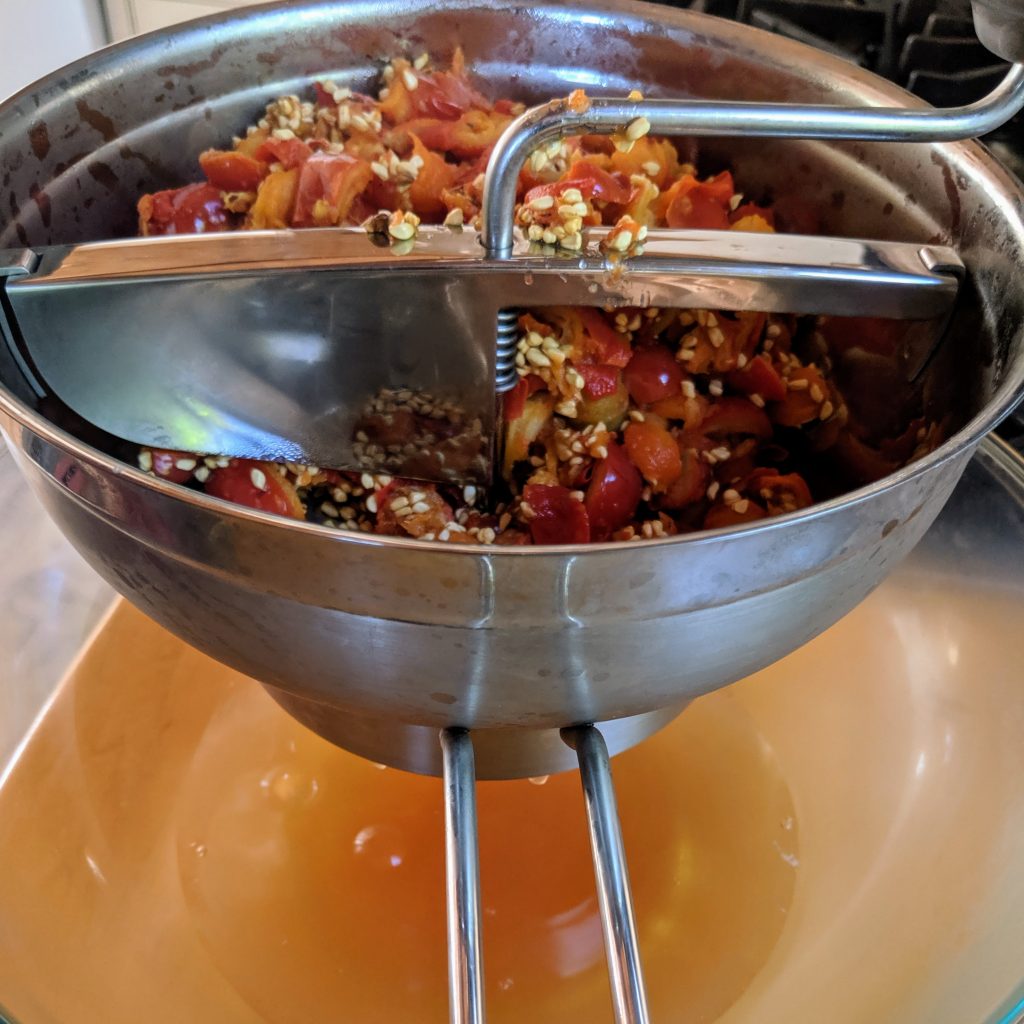
Next, cut them up and simmer them down to make a juice. It’s a seedy business!
Simmering some very seedy rosehips.
Strain off the juice—twice, to avoid the tiny hairs you probably won’t want in your drink or on your pancakes.
The first straining, via food mill.
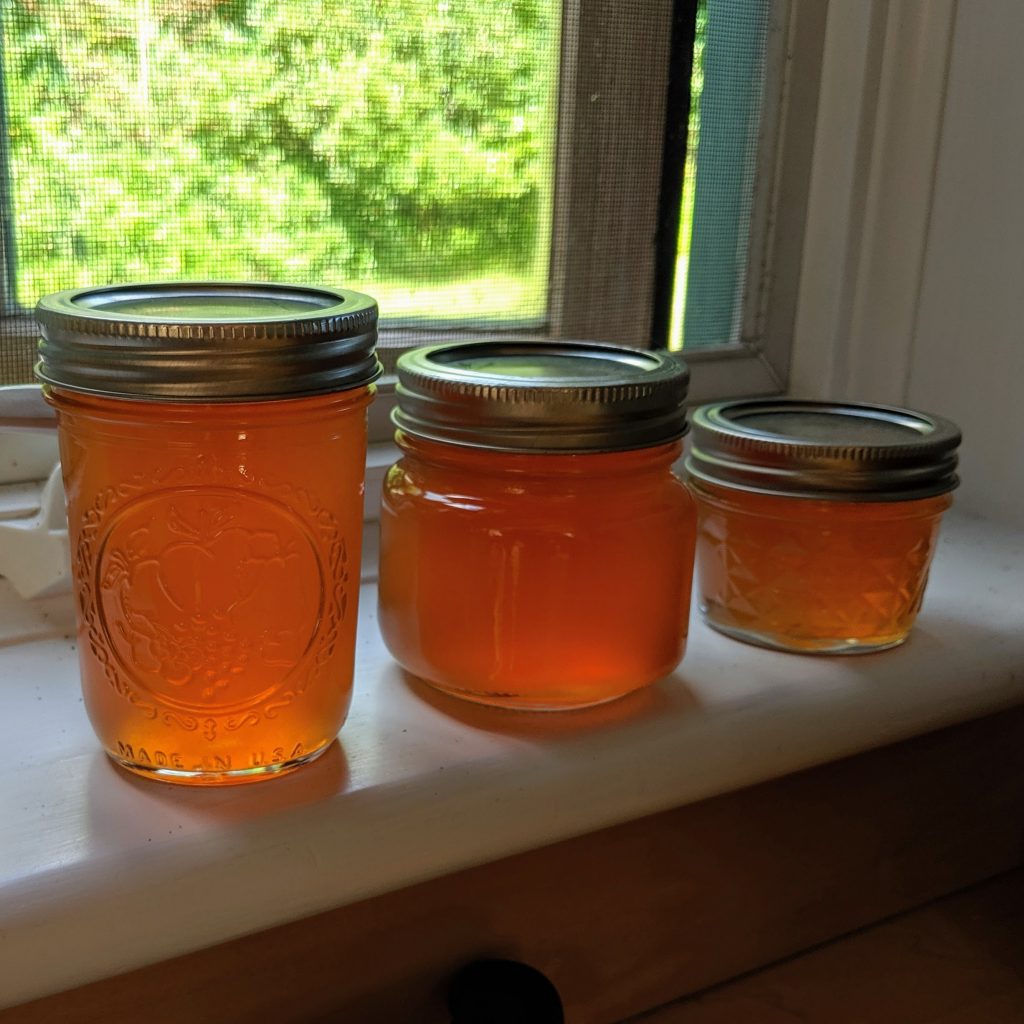
Mixed with seltzer over ice, the syrup has a fresh, friendly flavor: apples, sunshine, something vegetal. I think it’ll taste remarkably good in a spritz!
Rosehip syrup
Prep time: 15 minutes
Cook time: 1 hour
653g rosehips, untrimmed
733ml water
304g sugar
Clean the jars or bottles in which you’ll store the syrup. Keep the bottles in a hot (250℉) oven while you make the syrup.
Trim the rosehips: cut off the stem and the blossom end. There may be fuzzy, hair-like burrs in the blossom end—remove them. Wash and drain the rosehips; cut the rosehips into quarters and put them in a pot.
Cover the rosehips with water. If you have X grams of rosehips after trimming and washing them, you want 1.25*X grams of water. My 653g of rosehips yielded 582g of trimmed, clean fruit—so 733ml water. Bring the lot to the boil, simmer for 15 minutes. As the rosehips soften, crush them to make sure you’re breaking up the sin and extracting all of their juicy bits.
Strain the rosehips, first into a bowl, then into a clean pot. I used a food mill followed by straining through two layers of cheesecloth. The food mill seemed to introduce a lot of pulp in the resulting juice, so I suspect straining more slowly using just a muslin bag would work better. Most sources seem to recommend two stages of straining, since rosehips have irritating hairs in all kinds of places (as you may have noticed while trimming them).
Add the sugar the pot with the strained rosehip juice. If you have Y grams of juice, you want 0.65*Y grams of sugar. I had 467g of unsweetened juice after straining. (I suspect that using other methods of straining or taking more time would have increased yield.)
Bring the sweetened juice to the boil; boil 3 minutes, watching for foam (and skimming once things have died back). Fill the jars, cap, and store.
H.R.2657 a/k/a S.1232 a/k/a the PRIME Act is a relatively recent bill before Congress. The idea is simple: custom slaughterhouses should be able to sell meat to in-state consumers and retailers (i.e., grocery stores, butchers, restaurants, hotels, etc.).
The PRIME Act is a good thing for American food, and I hope you call your representatives to support it. The long-term success and sustainability of food in America depends on devolved, local control rather than centralized, industrial manufacture. The PRIME Act is a crucial step towards local control of meat production.
The state of play: meat sold in the US goes through USDA-inspected slaughterhouses, where full-time USDA inspectors do carcass-by-carcass inspection. The rules about these facilities are notorious for forcing a certain kind of scale; for example, hygiene rules mean that most facilities end up providing dedicated bathrooms for the inspectors. These facilities aren’t always close to producers. Your friendly farmer down the way may have to drive several hours to get to the nearest plant. Not fun for the farmer, not fun for the animal, not fun for the meat. Right now, custom slaughterhouses get used by meat shares (a nice bit of chicanery where animals are held jointly before slaughter and the meat is distributed among co-owners) and farmers raising their own food, but Federal law prohibits selling the meat retail. Custom slaughterhouses are still inspected and subject to state law, but the rules are less draconian.
You might worry—as I did—that the PRIME Act is deregulation gone awry. Don’t we want safe, inspected meat? While it’s possible that some custom slaughterhouses will do a worse job than USDA inspected facilities, USDA inspection doesn’t have a great track record. Moreover, the PRIME Act doesn’t override any state laws concerning custom slaughter.
You might worry—as I do—that the PRIME Act will pave the way for vertically integrated industrial meat: what’s to stop, say, Smithfield from avoiding USDA slaughterhouses and doing a custom job on-site? But the PRIME Act authorizes custom slaughterhouse meat for sale only in the state where it was slaughtered. I wasn’t able to find text in the bill mandating any particular labeling regime, but those details may be left to, e.g., state or FSIS regulation rather than law. Hopefully custom-slaughtered meat will be clearly labeled (beyond lacking the USDA shield).
Finally, you might look at some of the bill’s co-sponsors and balk. And: fair. Relaxing these rules is a moderately risky proposition, and it may even lead to decreasing the quality, availability, or affordability of food for some people. I’m still in support of the bill, though, because I think it will very much help the kind of small producer I’d like to see more of.
So: call your representative, especially if they’re on the Subcommittee Livestock and Foreign Agriculture. Tell them that you think the PRIME Act is a good idea: it will open up excellent new opportunities for small producers to connect with restaurants and consumers, both directly and through retail; it will create a new market for farmers, slaughterhouses, and butchers; it will support and sustain local food and, in so doing, local foodways and culture.
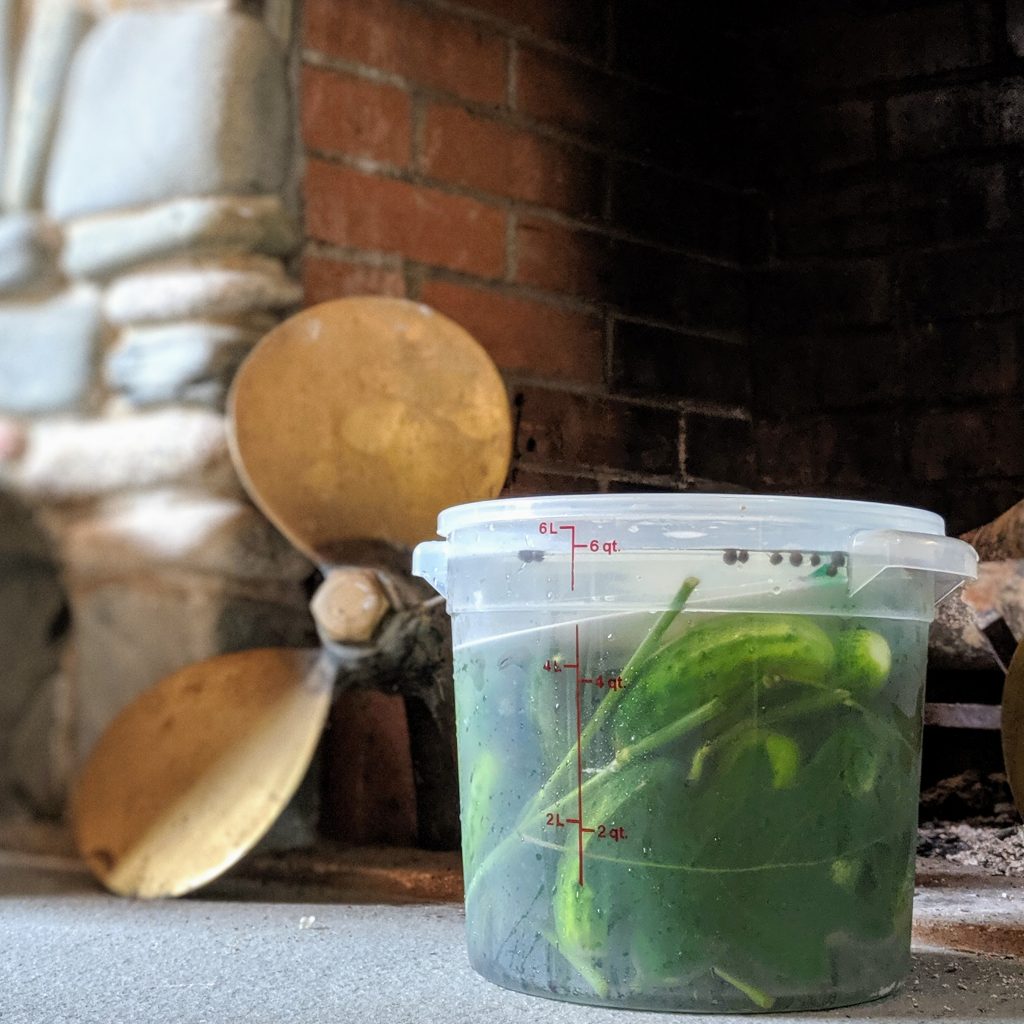
Pickling cucumbers are just coming in. Why not lay in a few pounds for summer hot dogs and sandwiches? I prefer a naturally fermented cuke. Not merely because I love process, but because I think fermentation gives better depth of flavor.
A tub of pickles-in-waiting sits in front of our fireplace. The stone helps things keep cool.
The general idea: 3-5% brine, a few days out of the fridge to get things started, and then slow things down in the fridge. (We’re getting highs of around 75-80ºF, which is a little too hot to get a nicely crunchy pickle.)
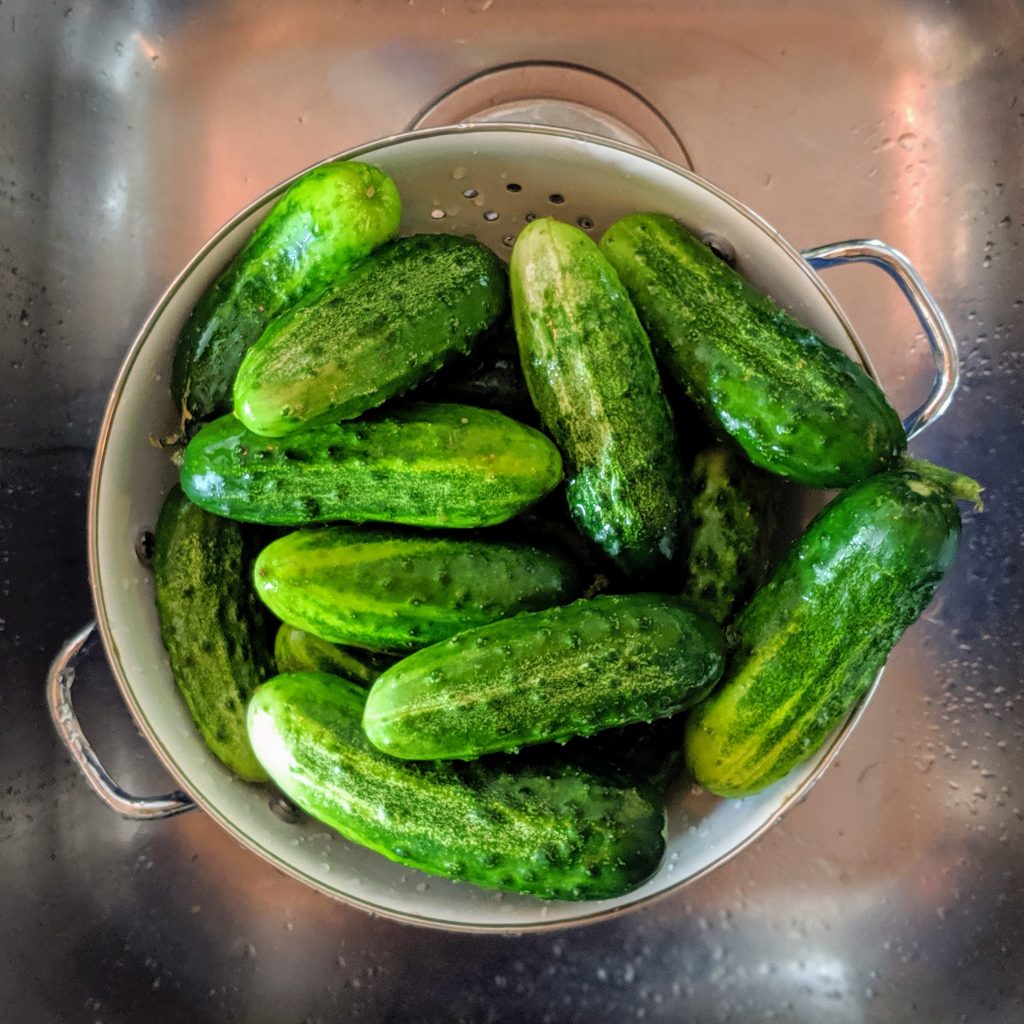
Some nuance: smaller cukes ferment more quickly and evenly. Clean them well and take off the scar at the blossom end. The stem is fine, but the blossom end can taste bitter and even lead to soft cukes.
3.5lb of washed (but un-cut) pickling cukes. You can see a blossom-end scar in the top left of the picture.
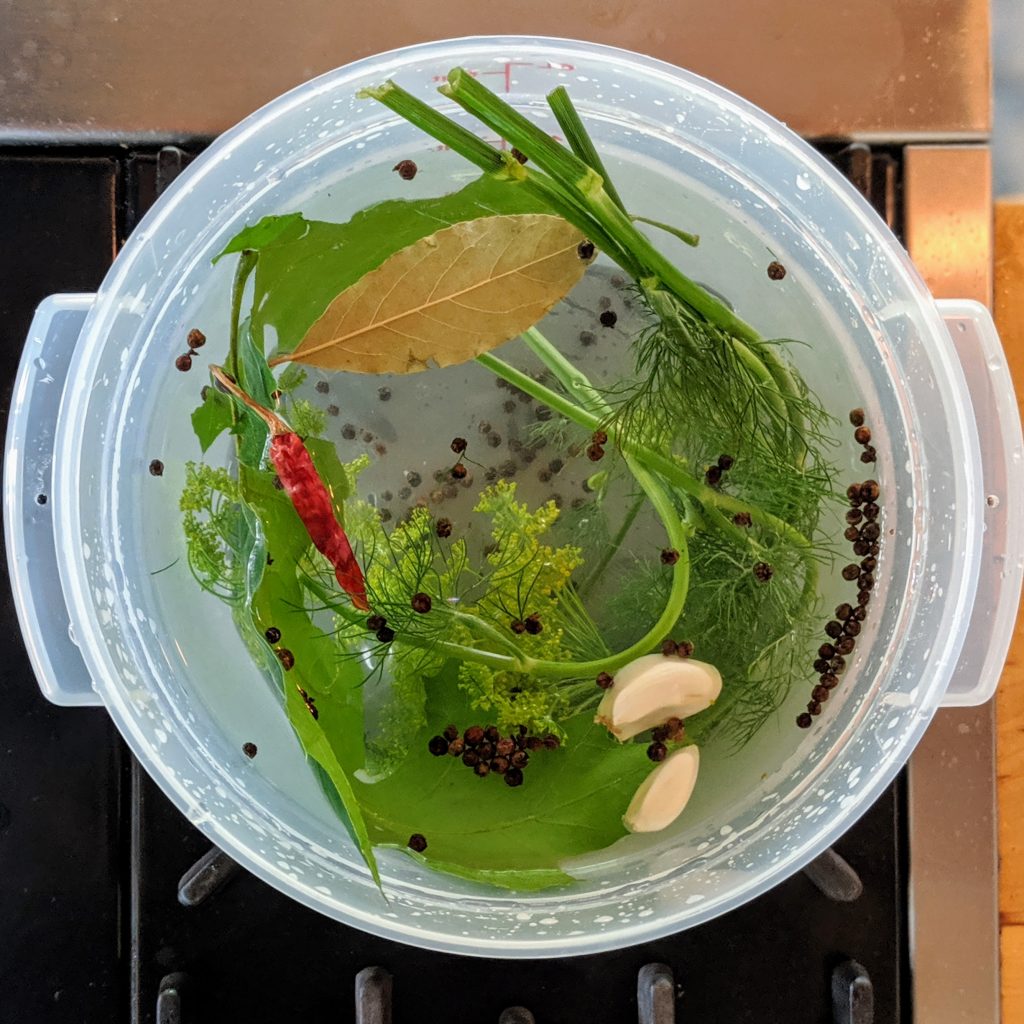
Some more nuance: aromatics. Dill is in the name, and dill leaf is nice—but nothing beats the flavor of heads of dill. A bit of dried chile, some garlic, and black pepper round things out. In this batch, I added bay and a few oak leaves—the tannin from the oak helps keep the pickles crunchy (and adds, I think, a nice bass note to the flavor).
Aromatics in brine. Dill heads, a bay leaf, two oak leaves, garlic, black pepper, and a chile de arbol.
Prep time: 15 minutes
‘Cook’ time (but YMMV): 7 days
1.66kg pickling cukes, scrubbed and washed, blossom-end cut
3.78L water
155g coarse sea salt
7g black peppercorns
6 heads of dill with stalks and some leaves
2 oak leaves
2 cloves of garlic, lightly crushed
1 chile de arbol
1 bay leaf
Mix salt and water with a whisk in a 6L tub; reserve a plastic big with some of the brine. Add the aromatics, then the cukes. Push cukes down with a plate, put sealed bag on top, and cover tub.
You’ll have half sours in a day or two; move the whole tub to the fridge once it’s clear fermentation has started (brine fizzy, cukes tasting ‘pickly’).
We got a fair few carrots from our CSA. They’re delicious raw or sliced into coins and glazed in a pan. Even their greens are tasty, if you treat them properly. But the focus of this post is preservation: pickled carrots.
We had a bunch of beautiful orange and purple carrots—about a pound and a half each. As usual, our recipe is based on one from the NCHFP. We wanted a lot of spices to play against the natural carrot sweetness, so we used mustard and coriander seeds, along with some heat from the Peruvian purple peppers we grow. But the real kicker were the fresh umbels from our garden.
No, it’s nothing to do with Uriah Heep. Umbels are a kind of inflorescence, common to lots of plants in Apiaceae. In fact, umbels are so common in that family that it’s also called “umbel-bearing”, Umbelliferae. We had dill and fennel umbels to split up among the jars.
Here are the notes—almost a recipe, if you squint. We definitely cooked them only briefly, less than the 10 minutes suggested by the NCHFP.
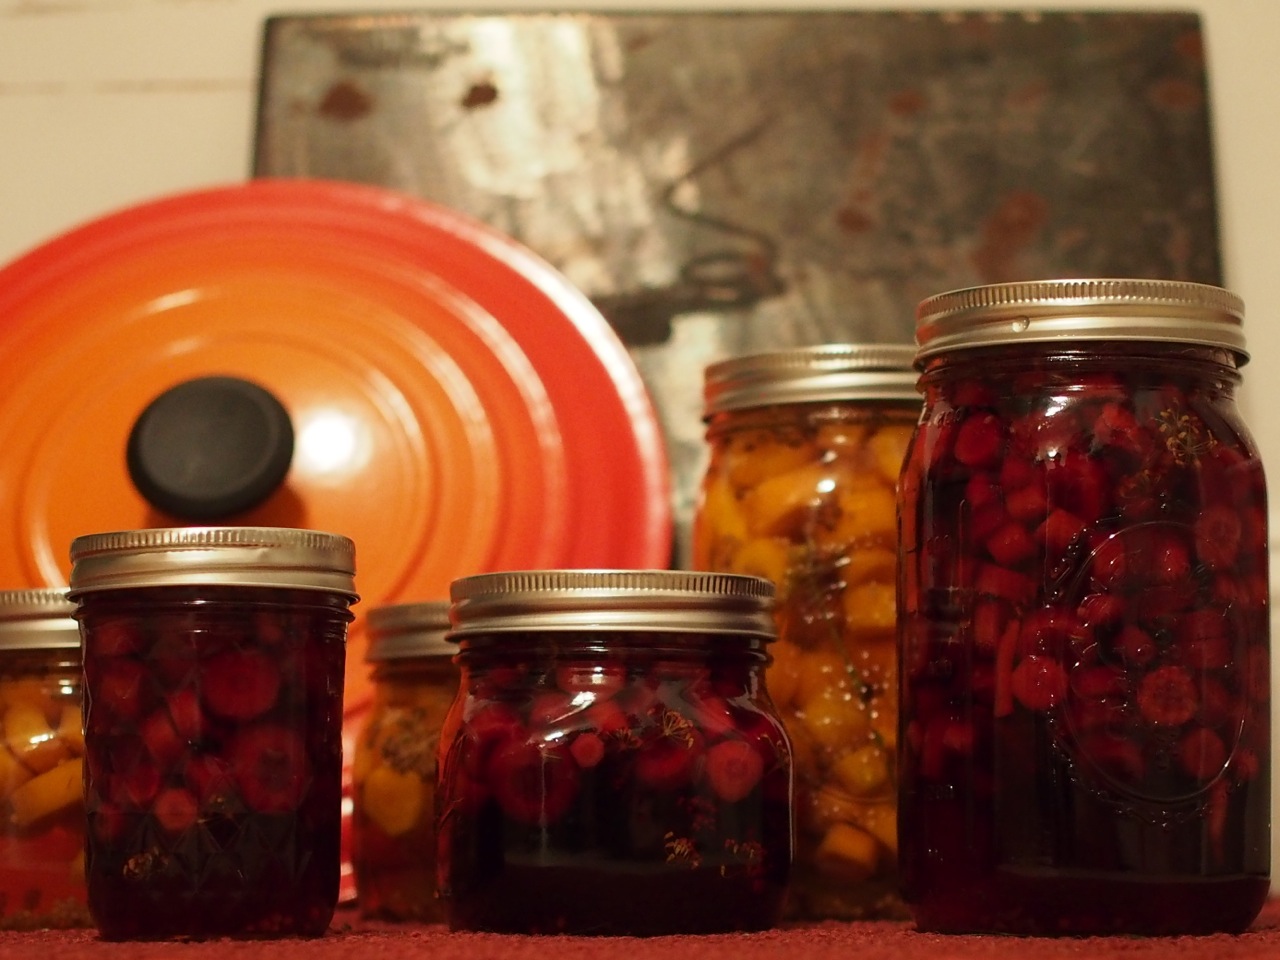
fennel and dill blossoms in the jars
fennel gets 3 bonus peppers
added 1.5x of vinegar, water, sugar, and salt for purple carrots with about 3C of leftover brine
+ 1t each fennel and corianer seeds, refresh 3 peppers
5 extra peppers in each jar
made 2qts orange, 1.75qt purple (?! probably more tightly packed)
These are tart pickles, not too sweet, with lots of great flavor from the seeds, especially the umbels. I imagine these would cut right through fatty braised brisket or hot pastrami, roasted pork belly, or seared duck breasts.
You have to start this recipe a day in advance. The first step is to walk up Ben Lawers and get soaked in a sudden downpour. You’ll be dry by the time you’re back at the car, don’t worry. Stop at a farm shop near the Mains of Taymouth on the way back; buy some eggs and a black pudding. The ice cream there’s not bad either, and the portions are huge. You should tell your Italian friend that one scoop is plenty for the both of you.
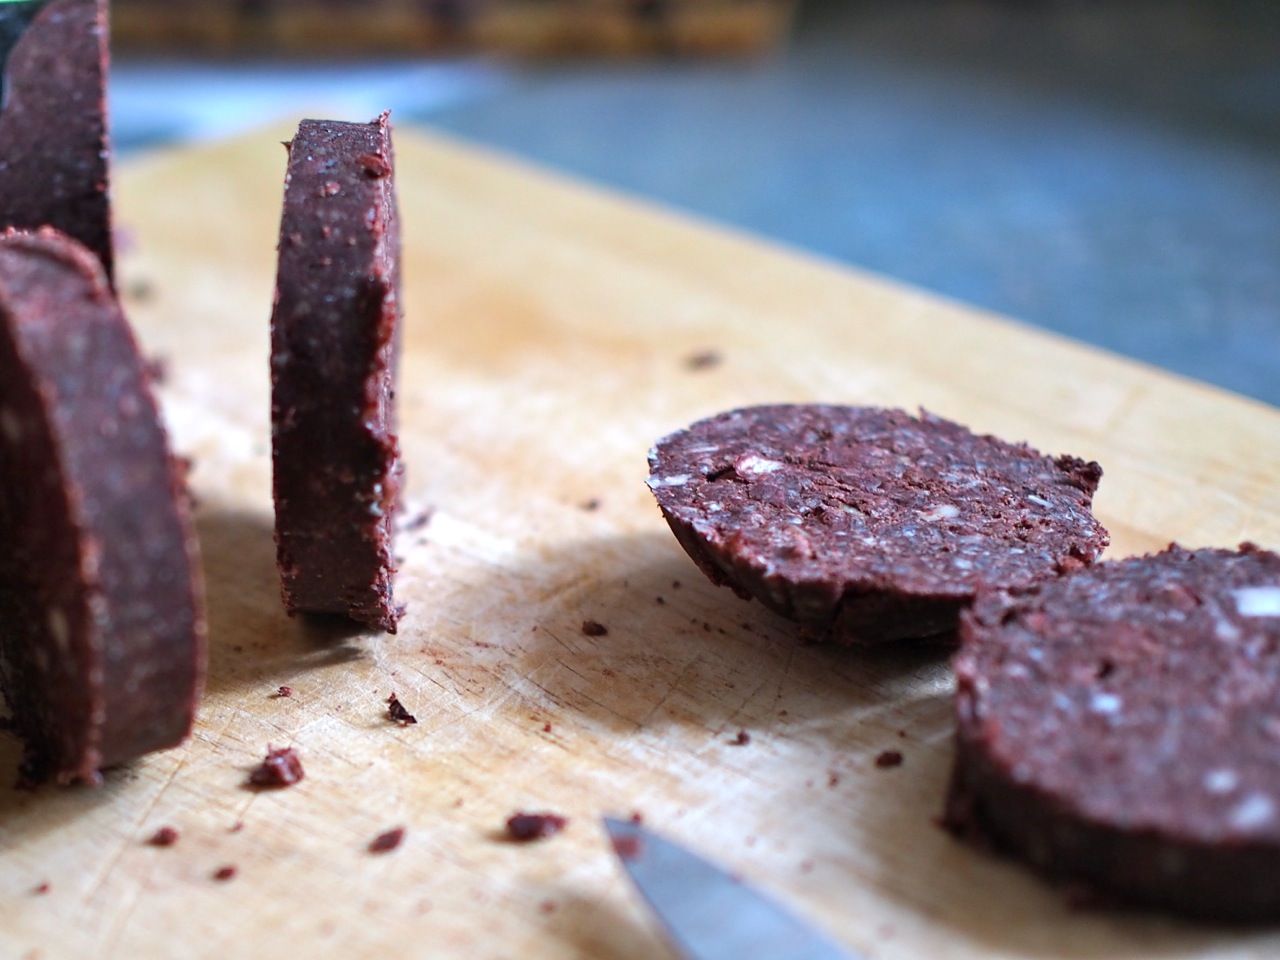
The next morning, slice up the black pudding and fry the slices in savory Scottish butter. Add the eggs a touch later. Your Italian friend will say that the butter is ‘so tasting’, and you will assume he means ‘flavorful’.
Toast helps but is by no means necessary. All talk about high cholesterol is to be strongly discouraged. Talking of any sort can only serve to distract you from the crisp crust, the iron tang of the blood, the grainy crunch of the oats, and the richness of the fat. The yolks’ brilliant orange will leave no room to wonder why your Italian friend calls them i rossi.
This recipe may be hard to reproduce, but I’m going to leave it here for posterity.
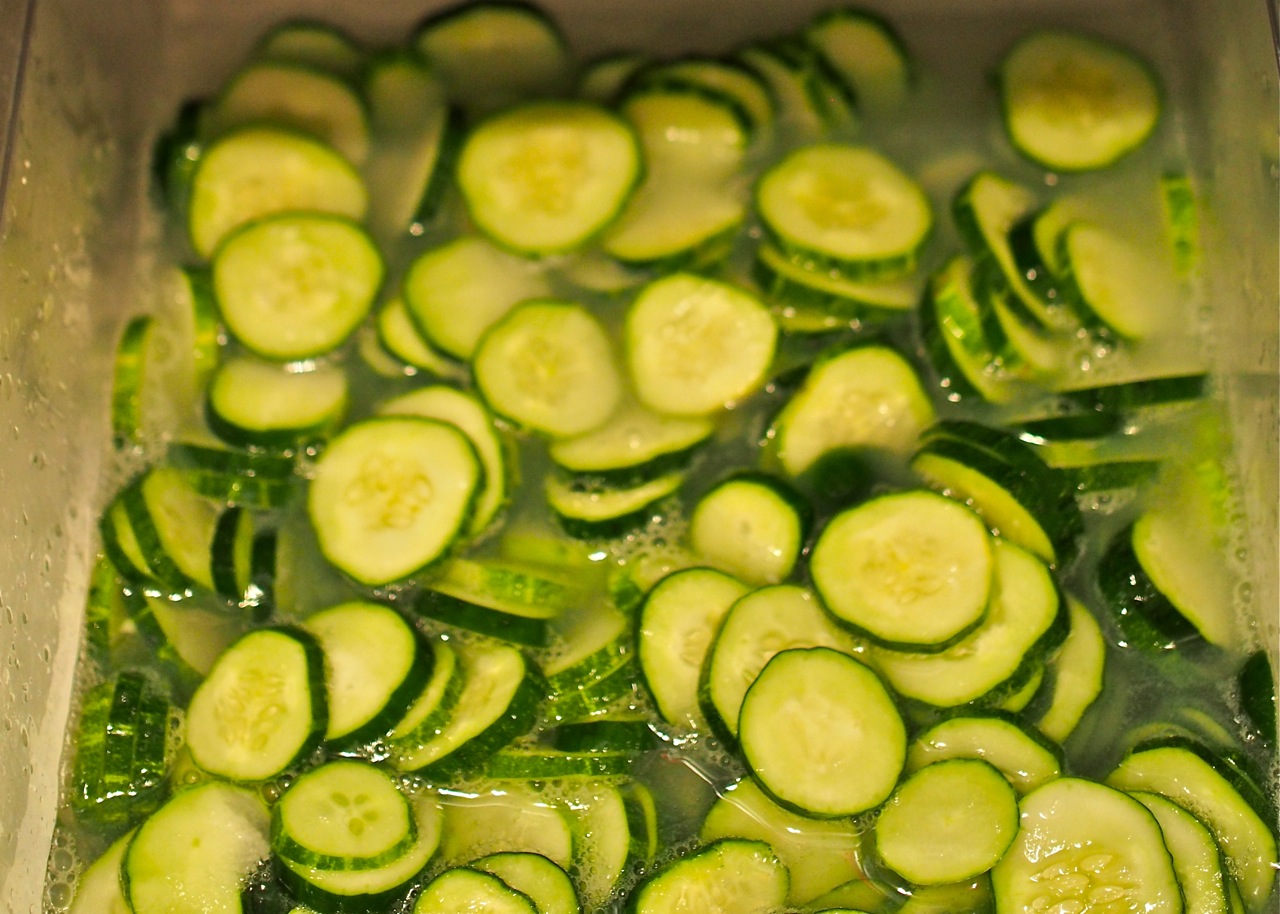
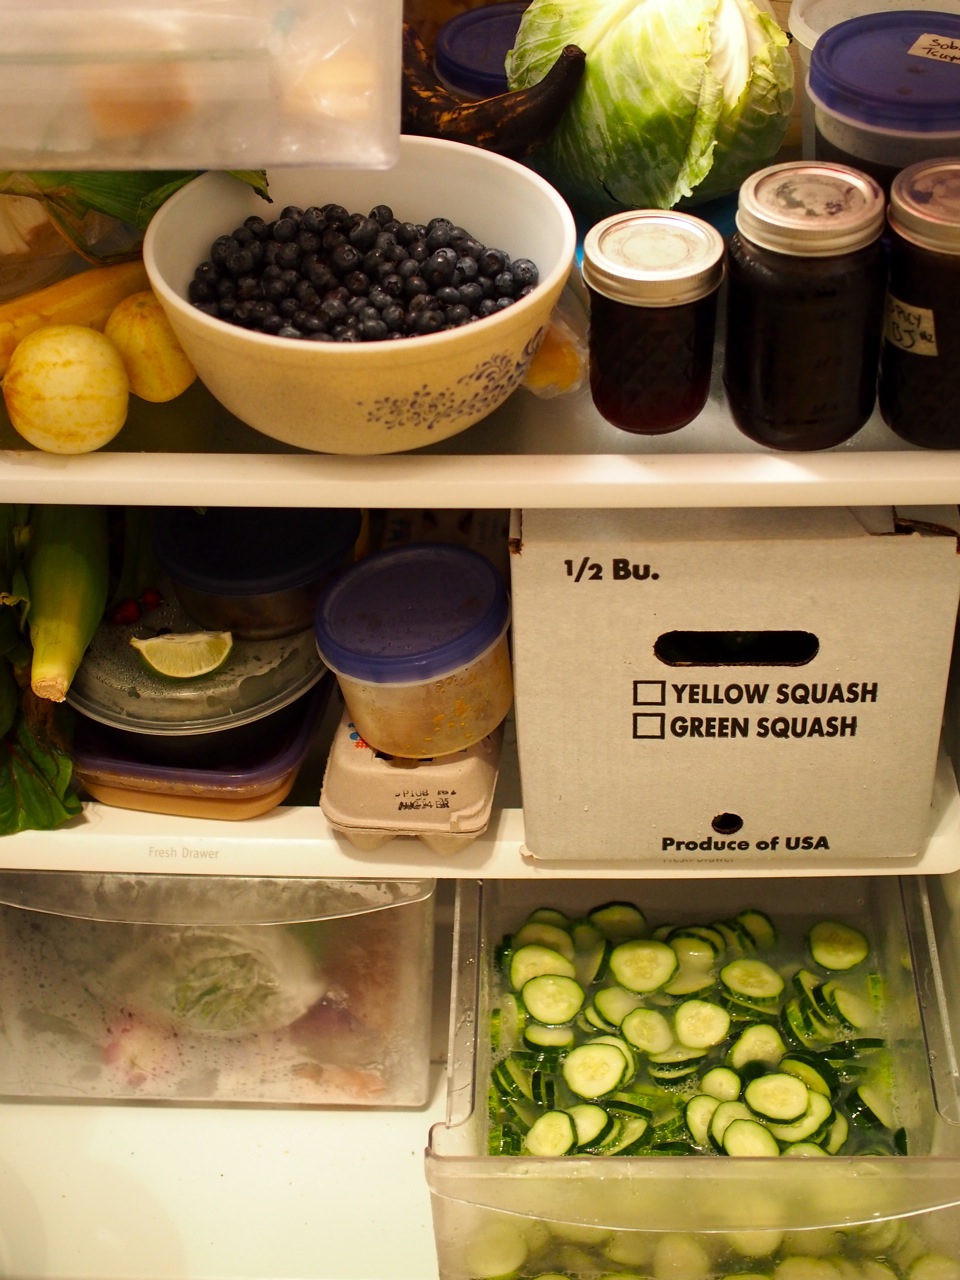
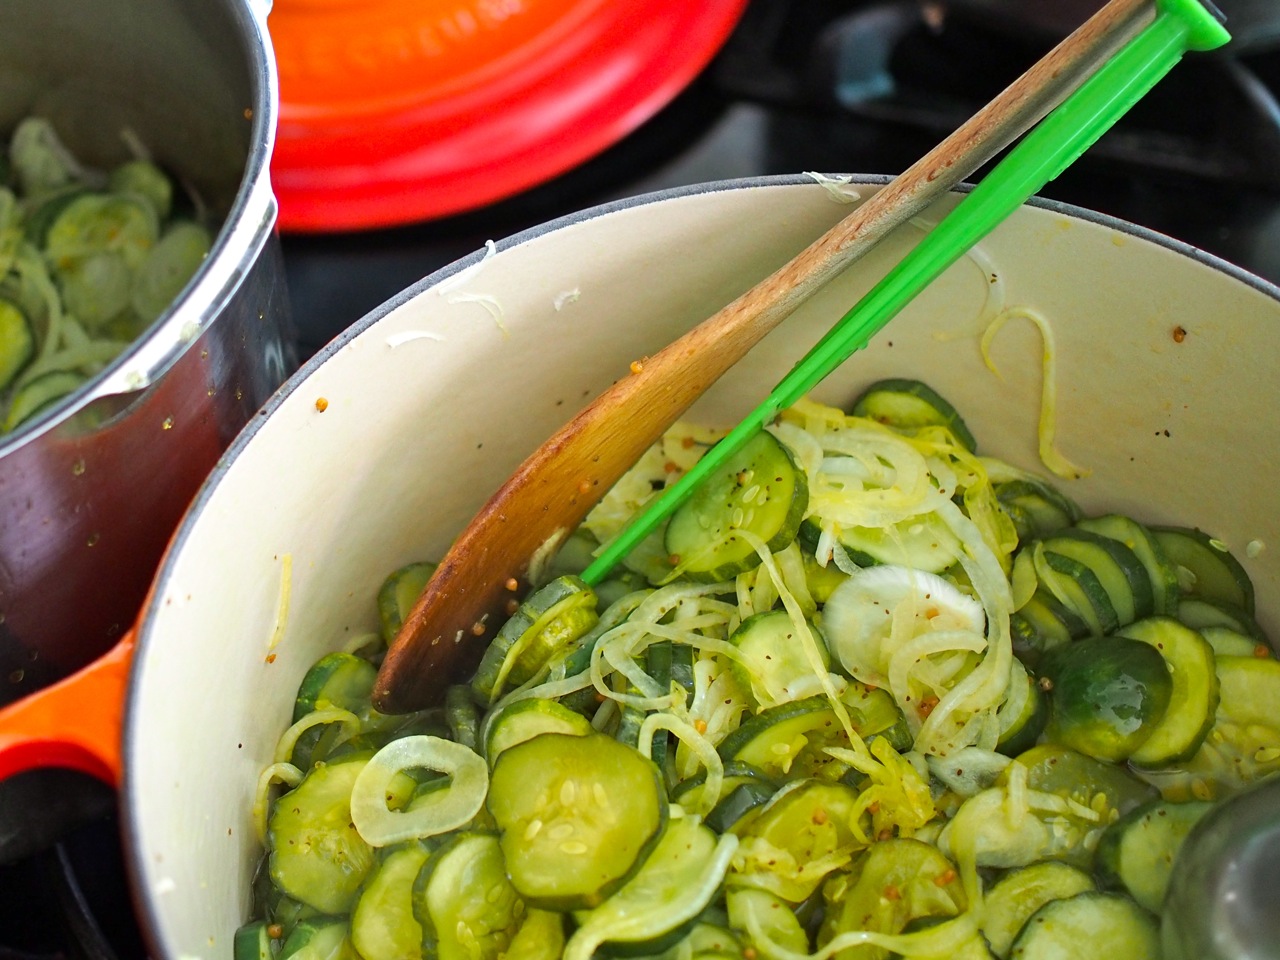
Blueberries were the first half of our bulk order from Lancaster Farm Fresh. The second half? Cucumbers. Twenty pounds of them, in fact. We made a three things: bread-and-butter pickles, relish, and some fridge dill pickles. That covered about 16lb of them—the rest got put into salads. There’s one thing I wish we could have done: natural pickles a/k/a fermented pickles a/k/a lacto-pickles a/k/a the Real Deal. But it was too hot in these parts, and my DIY ethic of building my own thermostat for a fermentation chamber trumped my GTD ethic of actually having a thermostat. So the Real Deal will have to wait for the fall (or whenever I finish building the damn thing).
This was a long, cucumber-y ordeal. Broadly: cut cucumbers, assemble spices, sterlize jars, cook the pickles as necessary, can. With two (determined) people, a lot can be done in parallel, especially when you’re cooking more than one recipe. And parallelism is even more important when one of the two of you is anal enough to check that the mandoline is cutting the 3/16″ demanded. (Hint: it was me, not Hannah.)
The NCHFP recipe for the bread-and-butter pickles suggested using calcium hydroxide a/k/a pickling lime for firmer pickles. Sliced pickles tend to get soft, so we went for it. (A mistake, I think—see below.) Calcium hydroxide is also used for nixtamalization, the process for softening corn for making tortillas and tamales; it’s called cal in Spanish. The large Hispanic population here in Philadelphia means that cal is easily available even though the ‘mainstream’ markets—whatever the hell that means—don’t have it.
And so: into the fridge’s bottom drawer for a nice long spa session. This is my favorite way to brine larger quantities—I’ve done hams and turkeys this way. Make sure you clean the drawer well first! All told, these bulk purchases can play hell with fridge space—it may be time for us to get a reach-in for the basement.
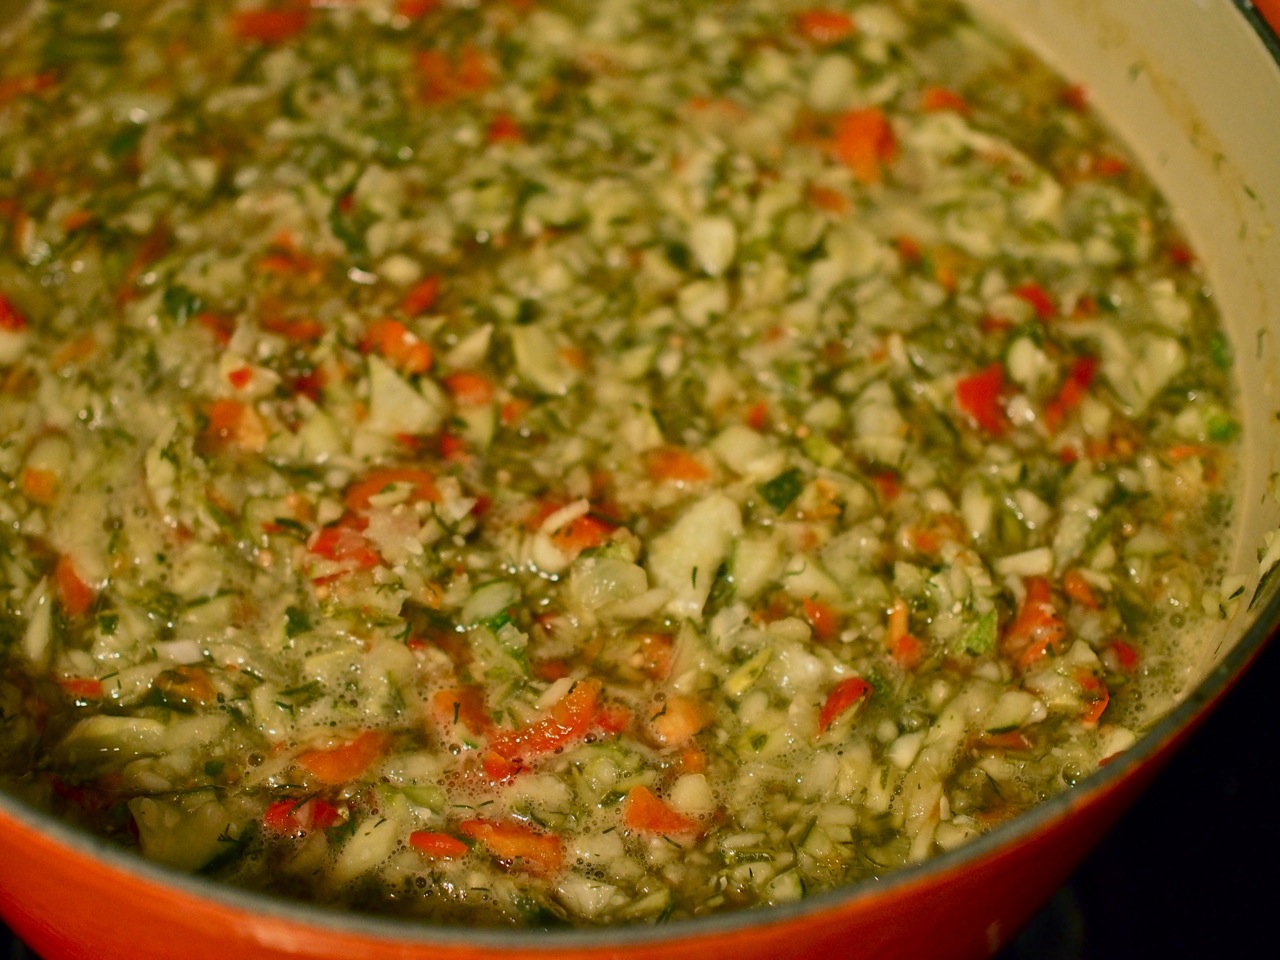
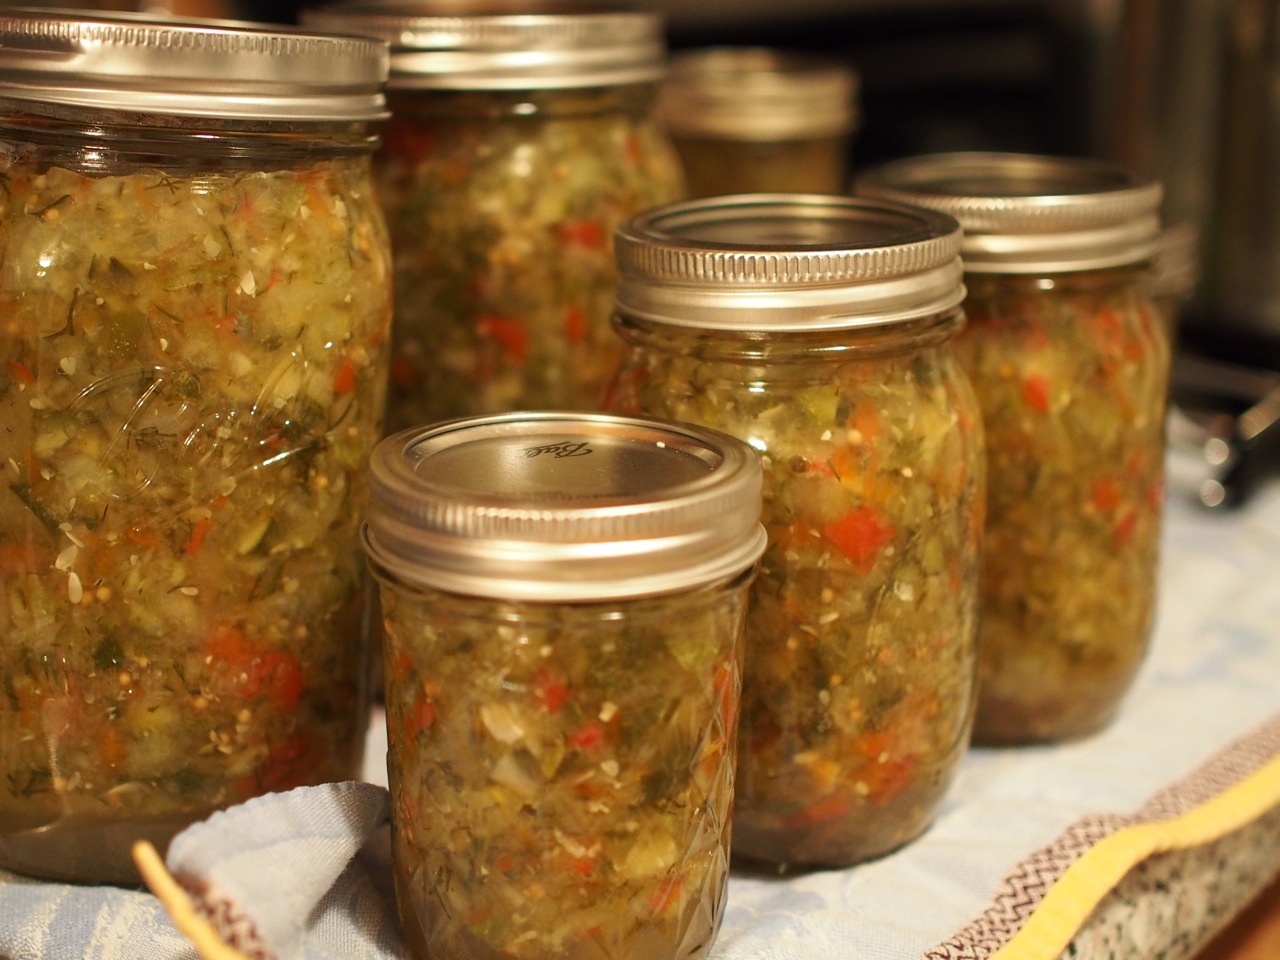
The relish recipe on offer at the NCHFP is quite simple and came out well. My notes say we followed their recipe to the letter, with the addition of 13g of yellow mustard seed.
The final product came out fairly wet—one jar didn’t seal, and we’ve been using a fork to strain the relish at serving time. But the flavor is excellent—salting and draining the sliced or chopped cucumbers before cooking and packing them may help next time.
The bread-and-butter pickle recipe produces an enormous quantity raw, especially when you consider the chalky stiffness of the limed cukes. We had to use two pots! My notes show that we departed a bit from the recipe:
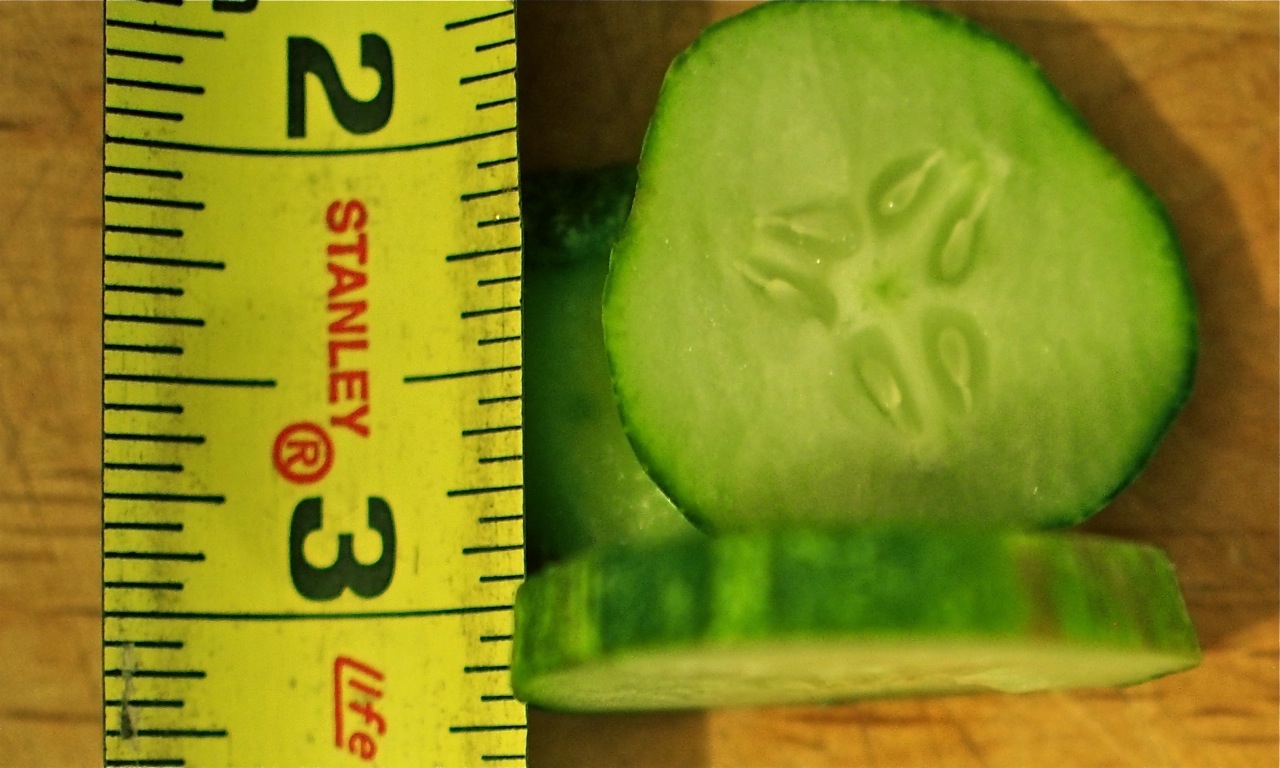
6 lbs of 4- to 5-inch pickling cucumbers
1 cup pickling lime (=111g cal)
Some batches we added chili flakes. The cal definitely gave the pickles an alkaline flavor and slightly chalky texture.
Recording weights as you go is a nice way to compensate for the American cook’s unhealthy obsession with volume measures. I can only assume that we use volume out of some libertarian ethic of freedom, or perhaps as a form of puritanical self-flagellation. It’s certainly not because volume is convenient—have you ever measured 1T of honey?—or accurate—what about flour?
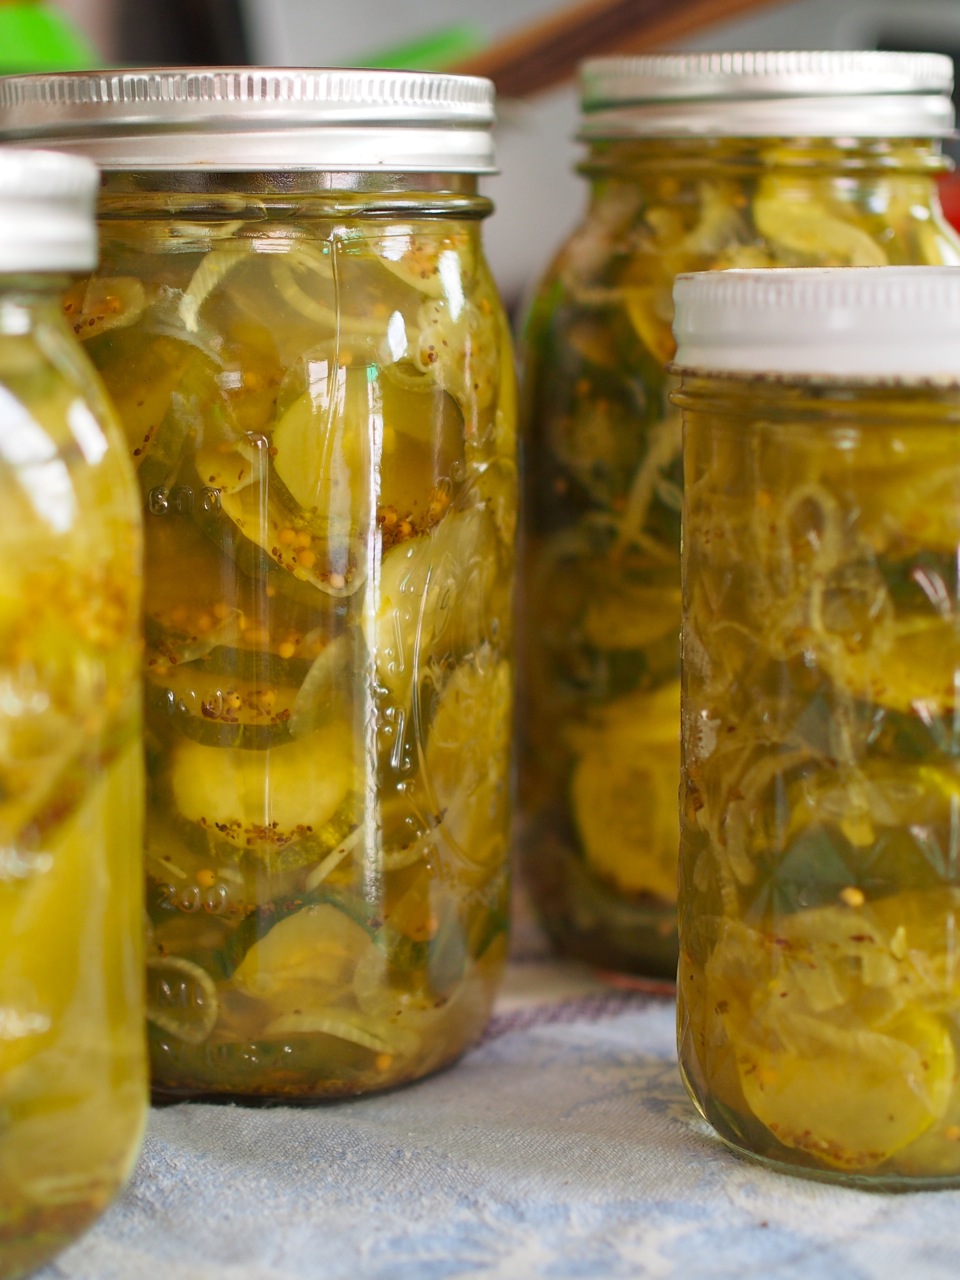
Even before canning, I noticed that the pickles were chalkily crunchy. Five weeks later—the recommended aging time—the chalkiness persists, though the alkaline flavor is mostly gone. I’d skip the cal next time.
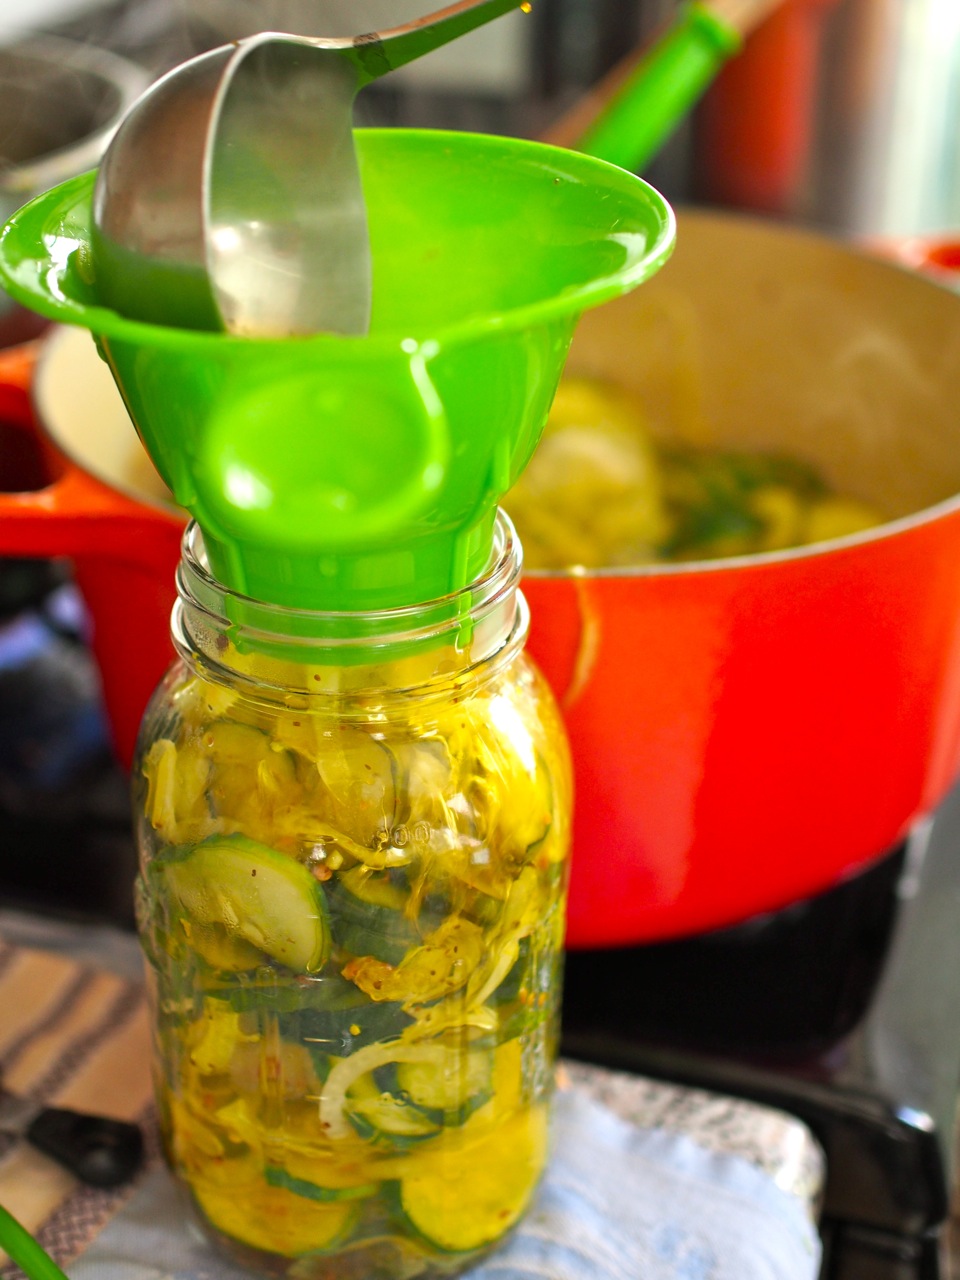
In my eternal pursuit of crunchiness, we opted for the “low-temperature pasteurization treatment”. The main idea is to trade time for heat, which keeps more juicy pickle structure intact.
When you don’t have a big water canner, doing two thirty minute batches isn’t the most fun thing in the world. But the reward is pretty great, even if they’re not perfect. Next time we’ll be changing the spices a bit, since the celery seed is a little overpowering. We’ll definitely skip the cal and its chalky crispness.
I apparently neglected to photograph Smitten Kitchen’s fridge dill pickles, but I do remember this: they came out impossibly salty at first. We had to rinse them before serving them at a party. They were tasty and we’ll make something similar again—but if only she had measured by weight….
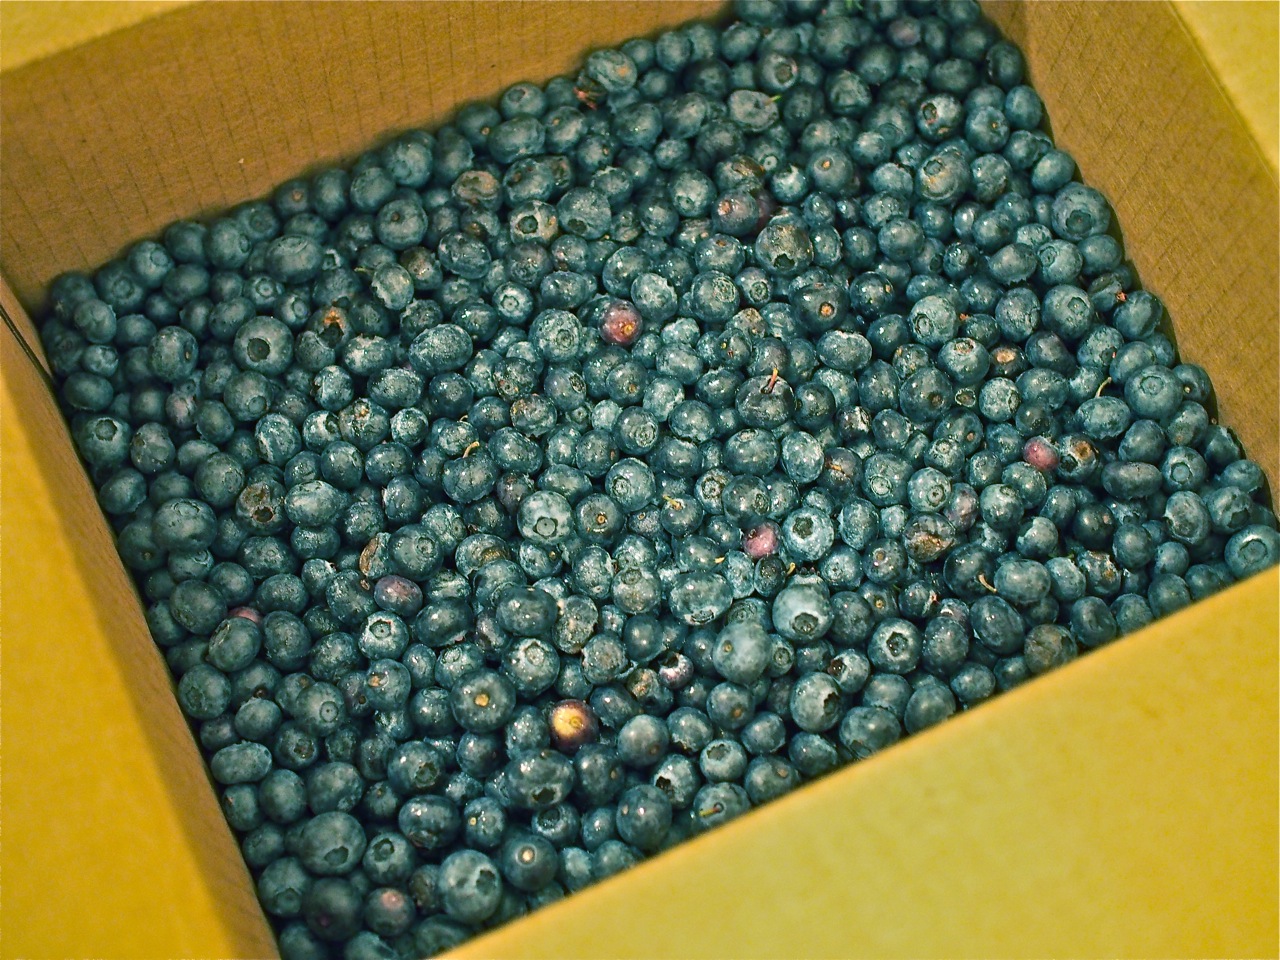
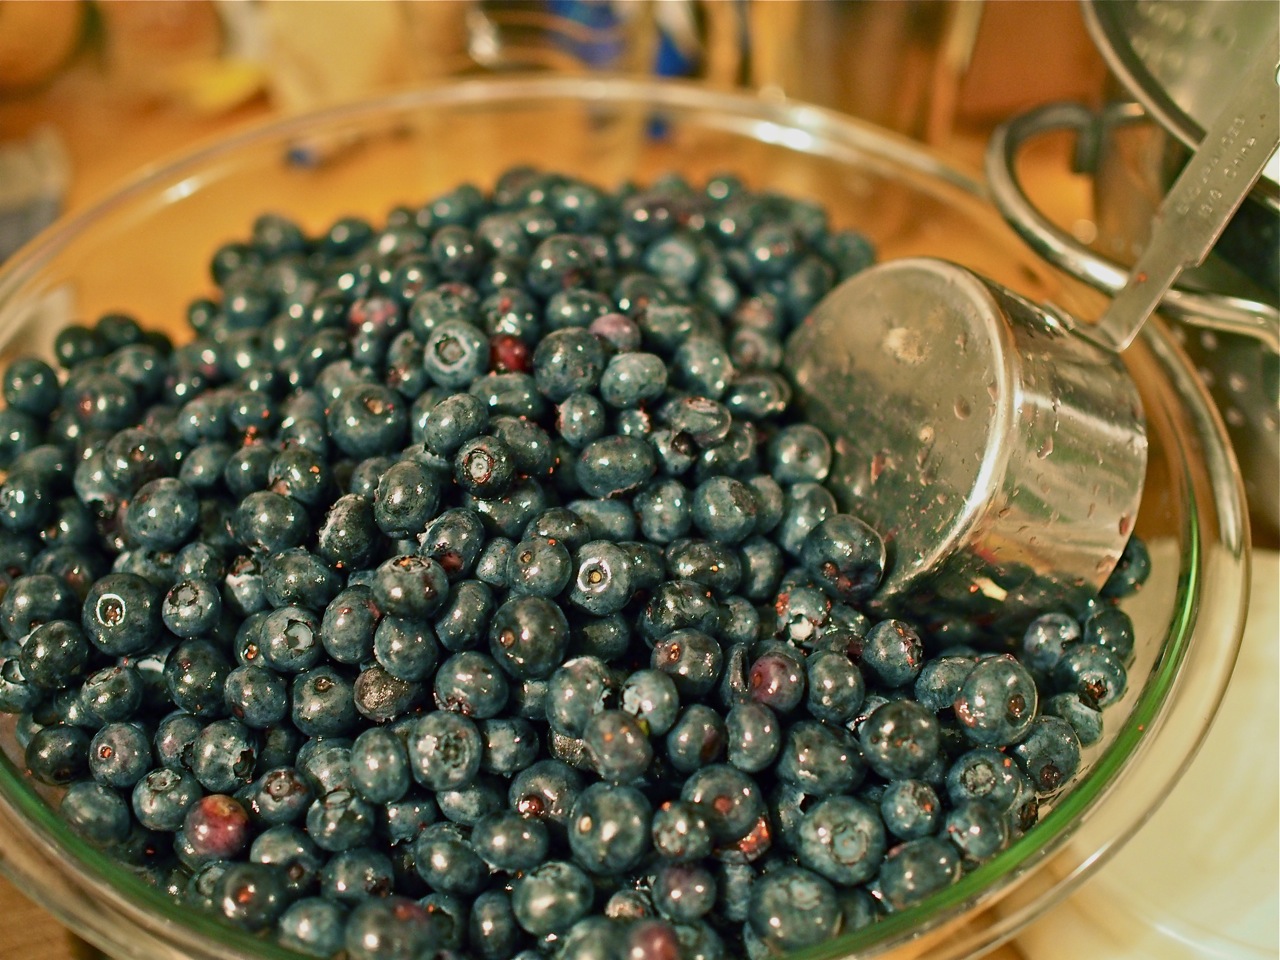
We get a CSA share/farm box from the Lancaster Farm Fresh Cooperative, our friendly regional organic mega-distributor. When they offered bulk purchases of blueberries and Kirby pickling cucumbers, I jumped at the chance. Let me tell you about the blueberries.
10lb of blueberries is, it turns out, a lot of blueberries and less blueberries than you would think. About 2lb of them, like most things in our house, got [eaten] out of hand. We made two large batches of jam, froze one or two pounds, and then jarred the rest whole in a light simple syrup (what the NHCFP calls medium, augmented with the bits of jam left in the pan).
The first step is sorting and cleaning. Mushy berries are just fine for jam; moldy berries less so. I wasn’t entirely impressed with the quality—the berries were above average for what you might find in a supermarket, but definitely inferior to farmer’s market berries at their peak. Still, at about $3/lb, it was tough to complain.
If there is a single most important piece of advice when it comes to canning and preservation, it is: take notes. We used two different recipes, and I copied them down with the salient changes.
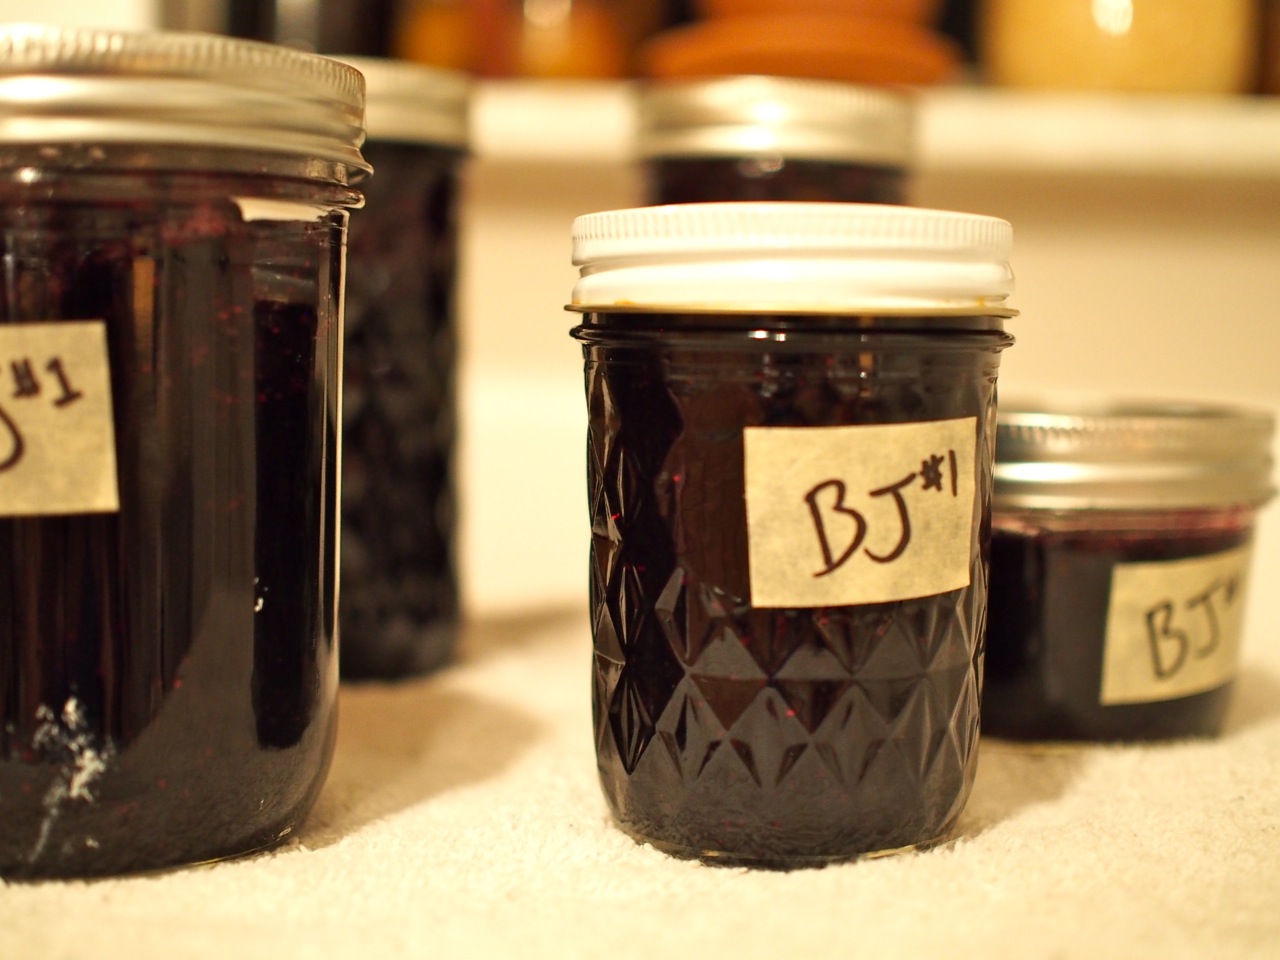
We made two batches of blueberry jam, which we referred to by number as BJ #1 and BJ #2. We wanted two different jams because variety is the spice of life—and also to compare powdered and liquid pectin.
BJ #1 followed a recipe from the National Center for Home Food Preservation, which has an extremely useful if un-glitzy website. We ended up getting 4 pints out of their recipe, using 1.1kg of sugar instead of the full 5.5C they asked for. I probably went heavy on the nutmeg.
Here’s what my notes say:
2-1/2 pints ripe blueberries
1 tbsp lemon juice
1/2 tsp ground nutmeg or cinnamon
5-1/2 cups sugar (used 1.1kg)
3/4 cup water
1 box (1-3/4 oz) powdered pectin
Canned 5 minutes. Made about 4 pints.
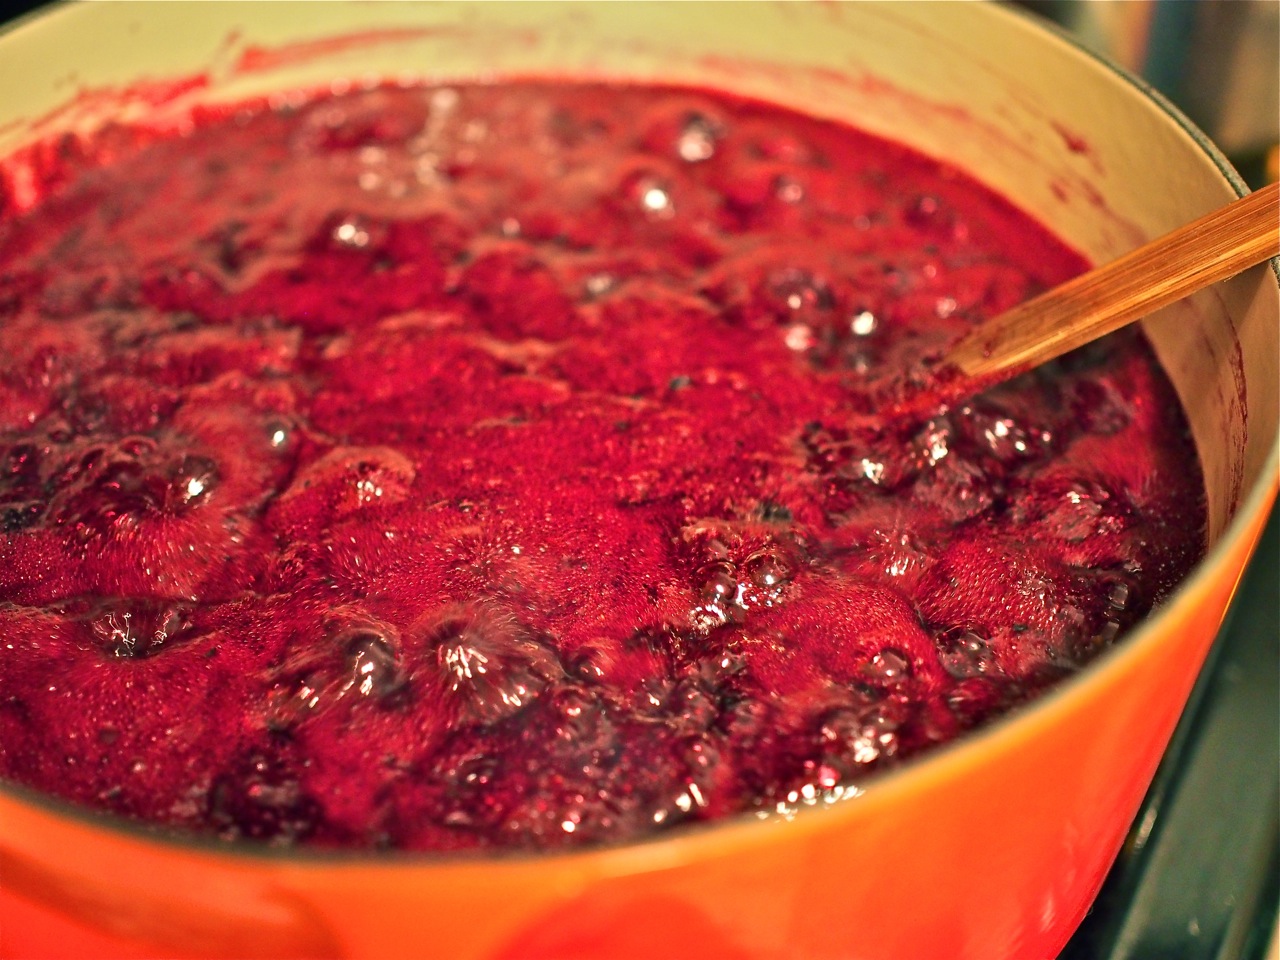
BJ #2 followed a random, spicier recipe. It produced 5 pints’ worth.
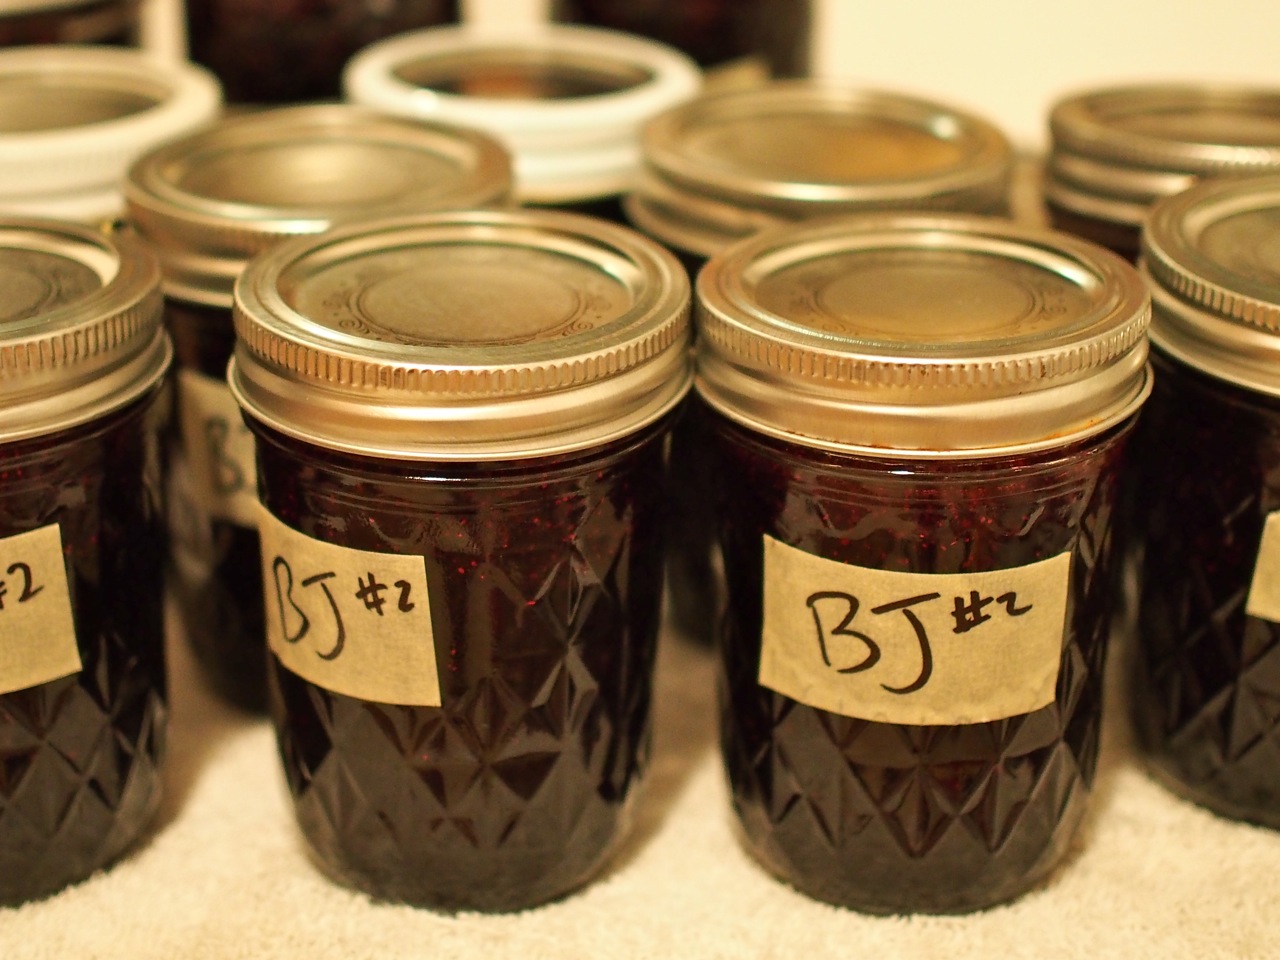
My confusion surely comes from the different amounts: 4 pints of blueberries made 5 pints of BJ #2, but 2.5 pints of blueberries made 4 pints of BJ #1? I truly don’t understand. We should have marked down the weights we used—I’d wager that each batch just used 3lb of the blues. Looking at the final product, the liquid pectin didn’t seem to set as well as the powdered. Since liquid is so much more expensive, powdered definitely seems the way to go.
Both jams are tasty, with BJ #2’s spicing coming through quite nicely. Having these put away feels powerful—these jams will adorn breakfasts, fill layers in cakes and pies, and enhance the larders of friends and neighbors for some time to come.